Friday, March 13, 2015

Inside the Studio: Creating a Sheep

Hi everyone,
Hope you are all doing well. I wanted to create a series of posts where I will talk about the thought and approach I take whenever tackling a new project. And a lovely little tag now helps you search for similar posts!

Gathering Inspiration

I knew ahead of time, that the next time I were to attempt a sheep, ram, or goat, I would make an art doll rather than a soft sculpture. I am just so inspired by people who sculpt the faces and feet of their animals. My favorite art dolls definitely come from Magweno.

Rather than sketching out a draft of what I want the finished piece to look like. I first decide on a color palette and then decide on the theme for the accessory. After playing with a variety of colors and themes, I decided to draw inspiration from the past and redo my first lamb.


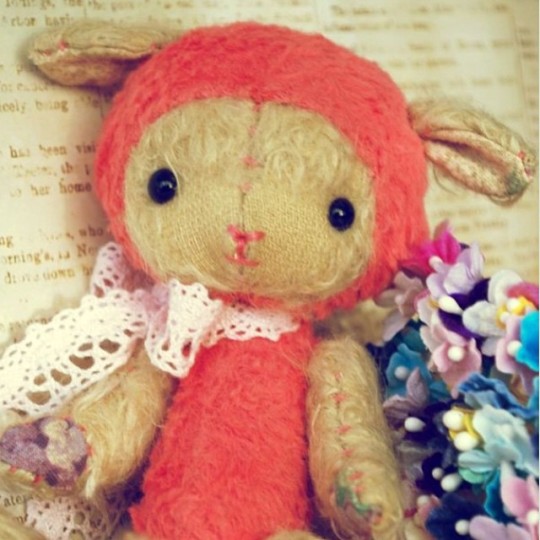
Back then, I bought my mohair and viscose dyed, but now that I have my own dye pots and dyes, I went for a softer cream and pink and then wanted to incorporate the flowers in by making a flower crown. I went with Forget-me-nots, and I love the colors of the batch in the first photo. I gathered some photos of flower crowns on Pinterest for an idea of how I would like to approach it in doll size. I like to collect doll photos and other crafting inspiration. If you need some images to get your started, you can find my boards here.


From the dye pot, I go straight into the doll. I know some artists like to sketch out a basic draft, but I am more of a kinesthetic person than a 2D visual person, so I like to be more fluid and play with the ideas before fixating on anything in particular.

Sculpting


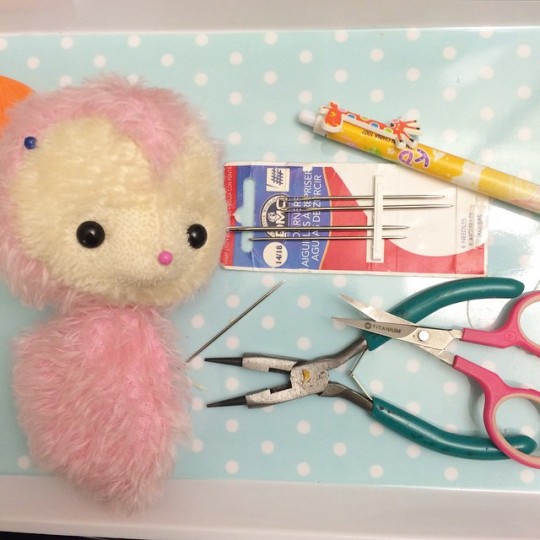
Next up I had to tackle on how I would like to create the face. I used a shorter pile for the face to distinguish from the longer pile in the body. I created a heart shaped face just as a preference. The blue pin marks where I intend to attach horns. 


I chose slightly larger eyes and a smaller, longer face after staring at some sheep photos. They also have that lovely nose that's very pronounced, so I tried to translate it into my doll. 


I went for a more distinct inverted "v" nose with a small face. Sculpting the eyelids downwards do give a more full sweet expression. Tip: The larger the eyes, the closer you might have to set them so that ends do not hang off the face. It still gives you enough space to add eyelids and a waterline. Nothing like a waterline for a more "dolly" effect.


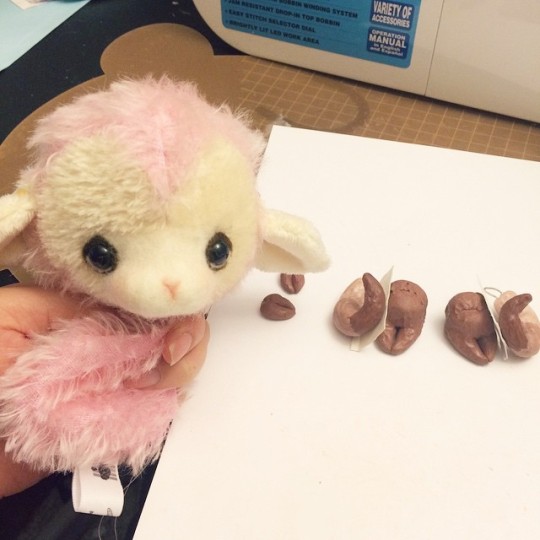
Continuing the Blooming Spring I went with a warm cocoa brown, I sculpted little hooves for the arms and then decided I wanted her to stand. Choose a larger flat design to help balance her head out. Using a ball tool, I textured her hooves and horns, drawing on anthro BJDs for inspiration. 

Choosing how to curl her horns was probably the most time consuming part. Lots of google searchs of sheep and sheep dolls and sheep sculptures were involved, and I played around with it and her ears to decide how they would best fit in her head. 

After all the pieces were baked, I made new limb patterns to fit the clay parts.  Tip: Don't use hot glue, it will not hold to either the clay or the fabric. Your clay will pull right off. I like using a cyanoacrylate of some sort (Super/Crazy Glue)


Once the limbs are made, all that's left is some assembling and the sheep is done.

Accessories

Last but not least are the accessories. For me, the little details really make the doll. I wanted to bring back some of the pinks, purples, and blues from the first photo, I braided a headband in my favorite shade of green and made some lovely flowers and buds. Then a little gloss and ribbon to finish it all off.


Well there you have it! One little sheep done!


It's an updated spin on a past idea! I hope you enjoy Divina as much as I did.

Stay tuned for more experimental adventures this year by subscribing via email or Google. Widget is in the side bar.

Until next time!
I'd love to hear from you, so keep in touch!
Laine

Tuesday, March 10, 2015

A Different Kind of February: Doll Collecting!

Laine here again! 

Hope you all have been well. I can't believe it's already the second week of March. February ended up being less of a doll making month and more of a doll collecting. Between work and having a really bad health month, I ended up finding comfort in dolls. I wanted to share with you a different type of work. I learned new skills and brushed up on rusty ones that I can't wait to bring to my future pieces.

Let's meet Evangeline. She is my 12 cm anthro cat girl doll from Hujoo. She is an ABS (hard plastic) BJD which makes her an affordable way to break into the doll hobby. She did take a bit of work because only the blank doll is shown, so you get the bare essentials. When deciding to get one, you will have to provide eyes, a face up, all clothes, wigs etc.

She is so petite and sweet once done though! 


Here are some WIPs as I was working on her. 
Top left going clockwise
1) Making a custom fit wig cap
2) First attempt with a face up with black eyeliner
3) Styling new wig
4) Second dress prototype
One thing you have to consider when choosing a doll is to decide if you'd be willing to make clothes or would you prefer to purchase clothes. I would recommend checking your dolls measurements and just seeing if they fall into the popular sizes: 1/3, 1/4, 1/6 and 1/8 scale. 

Third time's the charm though, so the third face up and third dress ended up being her final look. In the future, I'll be adding to her wardrobe and hoping to eventually learn how to sew doll clothes worthy of a BJD. Create my own little fairy tale little by little with these dolls. 


Next up is a Ever After High doll I customized.  I've love the concept and the webisodes since they were released in 2013. I had always followed Monster High, and when Mattel released Ever After High, it was like they were complimenting my aesthetic. I had hesitated with actually getting a doll because the wide heads and face sculpts were not as appealing to me as the Monster High sculpts, but seeing them in person was a completely different story. 

My fiance bought me the beautiful Apple White Thronecoming Doll. 

Mattel Promotional Photo
Mini Review: (will be posting a video review soon)
I was taken away by the beauty of the doll, but I had to replace mine because her body was improperly cast (leading to cracks) and the seam lines very messy. It might have been just a defective doll, because all the other Ever After High Dolls I got have very clean seam lines. It also might be that they did not expect me to undress her which is why the seam lines were messier than any of the other dolls where the legs do show. [If you have an Apple White Thronecoming doll, I'd love to hear your experience with the doll] Overall, she'd receive a 8.5/10 from me (0.5 points taken off for for the easy to break saddle stand) She's still beautiful, and I'd recommend her!

Custom work done:
First I restyled her hair to rescue it from being squished in a box and gelled. I recommend lifting up her hair to the roots to cut out the plastic tabs. You want to get as close to the head as possible to minimize any possibilities of scratching yourself. 


Then I removed her factory paint and used watercolor pencils, soft pastels, and acrylics to give her a softer and romantic look. I wanted her to look youthful since she is in high school. I kept her stock because I just wanted to redo her to fit my taste in my collection. 


That's all for now. 
Next time I'll be sharing with you a new design that I've made for the New Lunar Year!

Keep in touch everyone!

Friday, January 23, 2015

Disney Concept Art : The Mary Blair Exhibit

I had the pleasure of going to the Mary Blair Exhibit at the Walt Disney Family Museum last year. I always found the traditional cell animation of Disney so beautiful and still watch the old classics just to look at the background, so of course I had to see the wonder concept work behind Mary Blair. It was sad that most of her work didn't make it into the public eye, but this exhibit traced her art from its traditional roots where she learned proper technique, to her breaking all the rules with vivid color, and to the design of the Small Small World Ride.

I thought I'd share some of the photos I did manage to take. I have gotten out of the habit of living behind the camera and really took the time to sit and enjoy the work. We also got to enjoy a little corner of Marc Davis's work too!

Marc Davis


Mary Blair


One of my favorite pieces. I would love to hang this right over my bed and dream of Neverland


The Three Caballeros

These works were heavily inspired by her trip to South America.


Cinderella

And last but not least, one of my all time favorites


Hope you enjoyed seeing her work!
Keep in touch everyone,
Laine

Wednesday, January 14, 2015

Looking back: The Techniques and Art Challenges that Defined my 2014

I can't believe it is already 2015. 2 weeks in and I'm already getting swept away. It has been a crazy past year, but full of many new adventures and discovering both myself as a person and an artist. I had the wonderful support of 2 new regulars for 2014, and they challenged me and pushed me to do many new things!

I learned that I should expect less to be done in November and December between a convention and the travel time to see family for the holidays. So here's a recap of the FIVE new techniques etc that really defined my 2014!

1. Ombre Dyeing
My first true example of ombre dyeing started with a sunset and this little girl. Fading one color into another made for a beautiful hand dyeing technique and opened so many doors to different themes and expanded the stories I could tell with my work. It put a modern twist on my traditional techniques and made for a feast for the eyes.


2. Wings:
This year is all about wings. Goose wings, posable wings, fairy wings. I really went all out this year starting with these beautiful 1 meter goose wings. Learning wing and feather anatomy as well as constructing the bone structure to allow for opening and closing really made for my crowning glory this year! Definitely bought a lot more wire this year.


3. Clay:
When I first experimented with polymer clay, I really wanted to add it to my pieces as antlers, claws, and really make my pieces mixed media pieces. It started with an jackalope, but I really learned what I was doing when I made this beautiful winter buck. He was the perfect way to finish 2014 as well as teach me I can't bake thin pieces of clay in my oven at the stated temperature. Clay really gives me another medium to communicate through, and I couldn't be more grateful.


 4. Felt Flowers:
Nothing made me happier this year than taking my use of wool to the next level with both wool felt flowers as well as wet felted flowers. I never knew I could do these things with fabric that I have done with tissue paper, and they really allow me to explore this material to a entirely new dimension. Not only am I using felt to make scarves for my pieces and keychains, but now I can layer, cut, and felt to make beautiful pieces that can stand alone or pair perfectly to an ombre dyed doll.


5. Sewing Full Time:

Last but not least, I got to try sewing full time this year. Granted, I am still finding my niche in the market, but it is definitely enlightening to see what it means to sew 50+ hours a week and think about the numbers all the time. It made me think about what I was sacrificing in my art in order to make ends meet, and if I really wanted to do it as a job. We all know that when you are working vs doing a hobby, some element of enjoyment does leave. It really showed me what type of artist I want to be, and how I want to carry on with my art. Time really gave me a lot of food for thought, so I hope to share more wonderful things with you in 2015 as I straddle both being a teddy bear maker and a general plush artist.

Thank you so much for reading. I hope you've enjoyed my 2014 as much as I have. I really appreciate all the support and love you've given me. 

As always,
Keep in touch,
Laine