Showing posts with label story behind. Show all posts

Wednesday, January 14, 2015

Looking back: The Techniques and Art Challenges that Defined my 2014

I can't believe it is already 2015. 2 weeks in and I'm already getting swept away. It has been a crazy past year, but full of many new adventures and discovering both myself as a person and an artist. I had the wonderful support of 2 new regulars for 2014, and they challenged me and pushed me to do many new things!

I learned that I should expect less to be done in November and December between a convention and the travel time to see family for the holidays. So here's a recap of the FIVE new techniques etc that really defined my 2014!
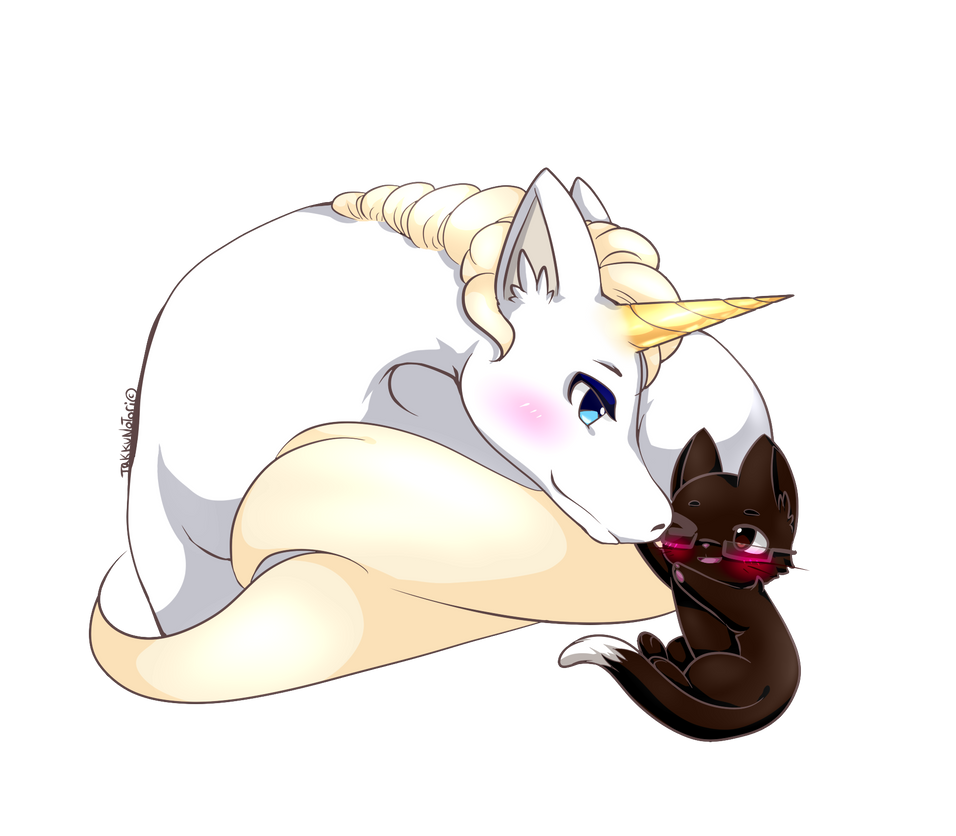
1. Ombre Dyeing
My first true example of ombre dyeing started with a sunset and this little girl. Fading one color into another made for a beautiful hand dyeing technique and opened so many doors to different themes and expanded the stories I could tell with my work. It put a modern twist on my traditional techniques and made for a feast for the eyes.
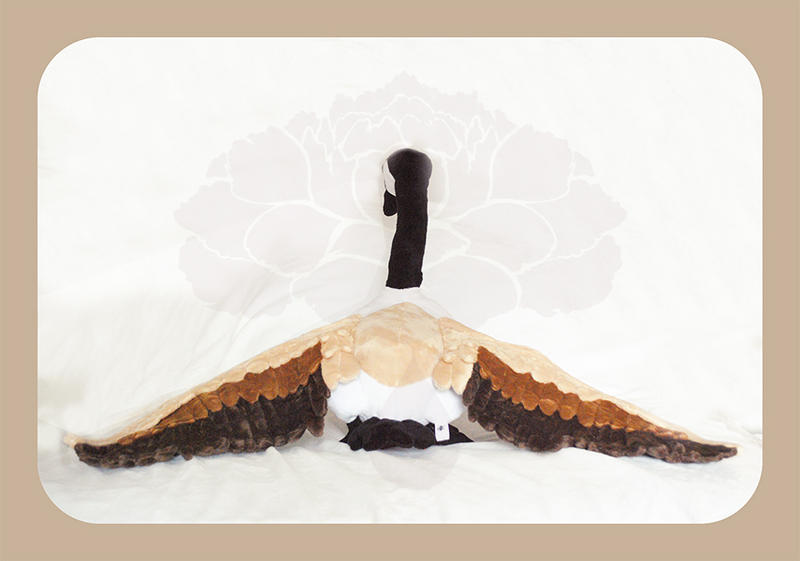


2. Wings:
This year is all about wings. Goose wings, posable wings, fairy wings. I really went all out this year starting with these beautiful 1 meter goose wings. Learning wing and feather anatomy as well as constructing the bone structure to allow for opening and closing really made for my crowning glory this year! Definitely bought a lot more wire this year.


3. Clay:
When I first experimented with polymer clay, I really wanted to add it to my pieces as antlers, claws, and really make my pieces mixed media pieces. It started with an jackalope, but I really learned what I was doing when I made this beautiful winter buck. He was the perfect way to finish 2014 as well as teach me I can't bake thin pieces of clay in my oven at the stated temperature. Clay really gives me another medium to communicate through, and I couldn't be more grateful.
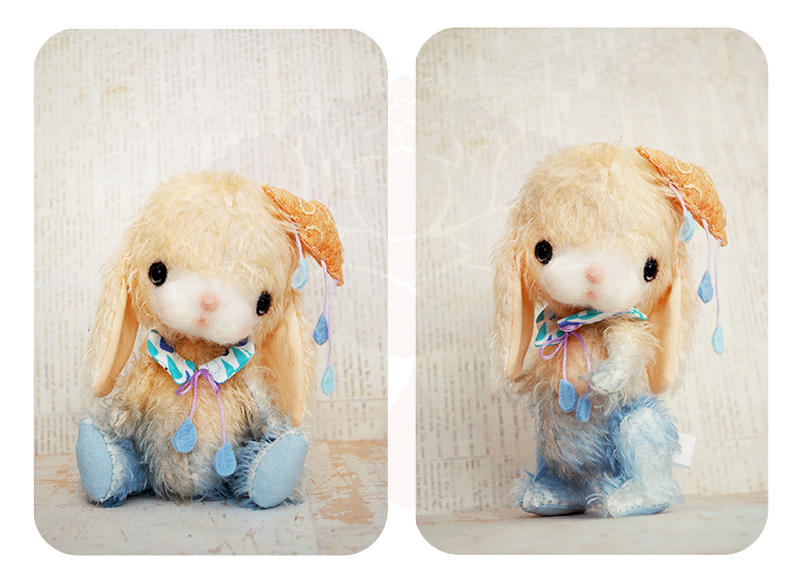


 4. Felt Flowers:
Nothing made me happier this year than taking my use of wool to the next level with both wool felt flowers as well as wet felted flowers. I never knew I could do these things with fabric that I have done with tissue paper, and they really allow me to explore this material to a entirely new dimension. Not only am I using felt to make scarves for my pieces and keychains, but now I can layer, cut, and felt to make beautiful pieces that can stand alone or pair perfectly to an ombre dyed doll.


5. Sewing Full Time:

Last but not least, I got to try sewing full time this year. Granted, I am still finding my niche in the market, but it is definitely enlightening to see what it means to sew 50+ hours a week and think about the numbers all the time. It made me think about what I was sacrificing in my art in order to make ends meet, and if I really wanted to do it as a job. We all know that when you are working vs doing a hobby, some element of enjoyment does leave. It really showed me what type of artist I want to be, and how I want to carry on with my art. Time really gave me a lot of food for thought, so I hope to share more wonderful things with you in 2015 as I straddle both being a teddy bear maker and a general plush artist.

Thank you so much for reading. I hope you've enjoyed my 2014 as much as I have. I really appreciate all the support and love you've given me. 

As always,
Keep in touch,
Laine

Tuesday, March 18, 2014

Summer Showers


I'm so excited to be able to introduce you all to Summer Showers. This was the first time I had a name in my head for the doll before it was even made. Usually I have to wait to see that face and get that feeling, but with her, I just knew.

I loved being able to share my process with everyone.(Her "Making Of" Post) I really liked being able to carry the motif of a fresh summer shower both in her accessories and in her colors. This was the second time I worked with gradients, and I really wanted to show many different gradients in her body (like an ever changing sky). You can especially see it on her back, where there are 3 areas where the color is allowed to fade as well as a surprise splash of blue on her head for a bit of whimsy.
Look at all those gradients!

Such a chubby little body & her magnetic little hair clip
I kept her face softer and rounder than all the other ones I have done before because I really wanted all of her to reflect that softness and warmth that I associate with summer. I instead of just rounding her eyes this time, I did pull down the top eyelid for a more feminine expression.
Close up side view of her face
Well that's it for mohair for now. I need to get my tuckus back on the commission track. Next up a Foosa. This should be quite an adventure for me. Can't wait to share it with all of you.

<3 Laine

Saturday, November 16, 2013

My Jointed Ponies: The Story Behind My Ponies

Growing up, the My Little Pony commercials definitely drilled the theme song into my head. It wasn't until 2012 though, I actually watched the pilot of the Gen 4 Series: My Little Pony Friendship is Magic. For those who know me, know that nothing draws me faster to a cartoon than a soundtrack and aesthetics and MLP FIM had both.

After watching the series, I really wanted to make a pony plush, I did some research and saw that I could not come close to the custom MLP plushes that were already available. All I had was fabric, embroidery needles (I like to sew with these), thread, and my hands. I had no embroidery/sewing machine, hadn't even heard of stabilizer at that point, and could not satin stitch the strands of the mane and tail, but regardless I was going to figure out something.

4 prototypes later, I realized that one of my weaknesses is one piece bodies, so I went to make it the way I knew best: jointed dolls. I lacked an embroidery machine and hand embroidery on minky was a struggle for me (given that there is fur you have to hide with the thread). I put in glass eyes, shaped eyelids with some wool, and designed manes to match their filly times hence eliminating the needle to embroider anything!

A few more prototypes later, I was able to get a doll that had the proper hock, would stand, and was proportioned correctly. Upon the completion of my first pony: Fluttershy, I realized that the body wasn't as suited for the legs, so I changed the shape of the body gusset to emulate  the effect that was achieved by the one piece doll.

Each doll's mane and tail are assembled by individual pieces of fabric to give the appearance of strands in the mane and tail. The amount of painstaking hand sewing work has made me want to throw the towel in a few times, but I'm glad I haven't.

So far the fruit of my labors has resulted in 6 character ponies and 1 over-sized custom unicorn.


Fluttershy
Rarity
Twilight Sparkle
Rainbow Dash
Princess Celestia
 Princess Luna

White Unicorn Commission

Luna and Rarity are still available
http://shadowedporcelain.deviantart.com/art/Vintage-Rarity-2-Available-362360861
http://shadowedporcelain.deviantart.com/art/Vintage-Luna-AVAILABLE-387074739

All others have found homes.

I hope you enjoyed them!

Thursday, November 7, 2013

My First Large Doll: The Story of a White Unicorn

Edit: Now with references since the commissionw as delivered.

For the past 2 1/2 years that I've been plushing, I have never made anything over 6.5 inches. I received a challenge this year from a commissioner to make something relatively to scale based on an image they gave me. I made two dolls and had wanted one to be 3x bigger than the other.

(I apologize for the poor background. This plush is larger than any setup I have for photographing it.)

For me, there are 3 main differences I faced when scaling up. They came up in :

  • jointing
  • eyes
  • construction of the mane. 

Jointing:
One of the things I definitely struggled with was figuring out how to joint the doll. I worked with bolt joints for the first time and having never even used a wrench before it took some figure out. I picked a tapbolt with a nyloc nut, and I was frustrated for a couple of days trying to figure out why the limbs kept falling off, only to realize I have to break the nylon on the nut.

Eyes:
It was also the second time I worked with colored eyes, which always throws me off when looking at the face. Constructing the eyelid and white of the eye out of wool at such a size also threw me off.

Construction of the Mane:

The mane itself was an even bigger job than the ones on my small ponies (even though the small manes are all sewn by hand). For the mane, I machine sewed each strand, stuffed it, then hand sewed them onto the head as well as sewing the strands together for one continuous piece. I am very pleased to get results that match the reference I was given

To sew the strands together and attach them to the head took 7+ hours of hand sewing alone, not to mention the time it took to construct the strands.

Last but not least, I have attempted satin stitching on my machine to put together a tail, but I have yet to get the result I like despite using heavyweight interfacing. I know the results can be achieved without a walking foot, but I have yet to figure out how to get smooth stitches.

Overall, I am happy with my first attempt at a large doll and his mane sorta makes him look like a princely character to me. (I've been watching too much MLP) He'll look more complete with a tail and all the proportions will make sense then. Hopefully I will figure out a way to photograph him so that the photos will do him justice.

Until then,
Laine

Saturday, September 28, 2013

Adventures with a Sewing Machine


Another cloudy weekend morning where I have to go into work. I have actually been more interested in working on this commission than crunching some data and struggling with the new assay we are using in our lab. My boyfriend got me this little machine. Having never machine sewed, I did things via trial and error. After 1/2 a spool of hand sewing thread, I figured out a couple things:
-I can't use hand sewing thread on a machine
-When bringing up the thread from the lower bobbin, I need to actually pull out the loop, not maintain it
-I can't get good tension with super thin fabric
-Although there are techniques for sewing round pieces without pinning, for a first time user, it's better to use pins

After a couple of hours figuring it out and finally getting the tension right, I started working on this unicorn. I have the head, legs, and body sewn. Now it's just waiting for ears, mane, horn, and eyes. I put my finished kitten next to it to show the scale. Both are private commissions.

Hopefully after my project due on the 6th, I'll have more time to work on dolls.