Showing posts with label dollmaking. Show all posts

Thursday, May 1, 2014

Moving one step at a time: Commission WIP

Good morning everyone,

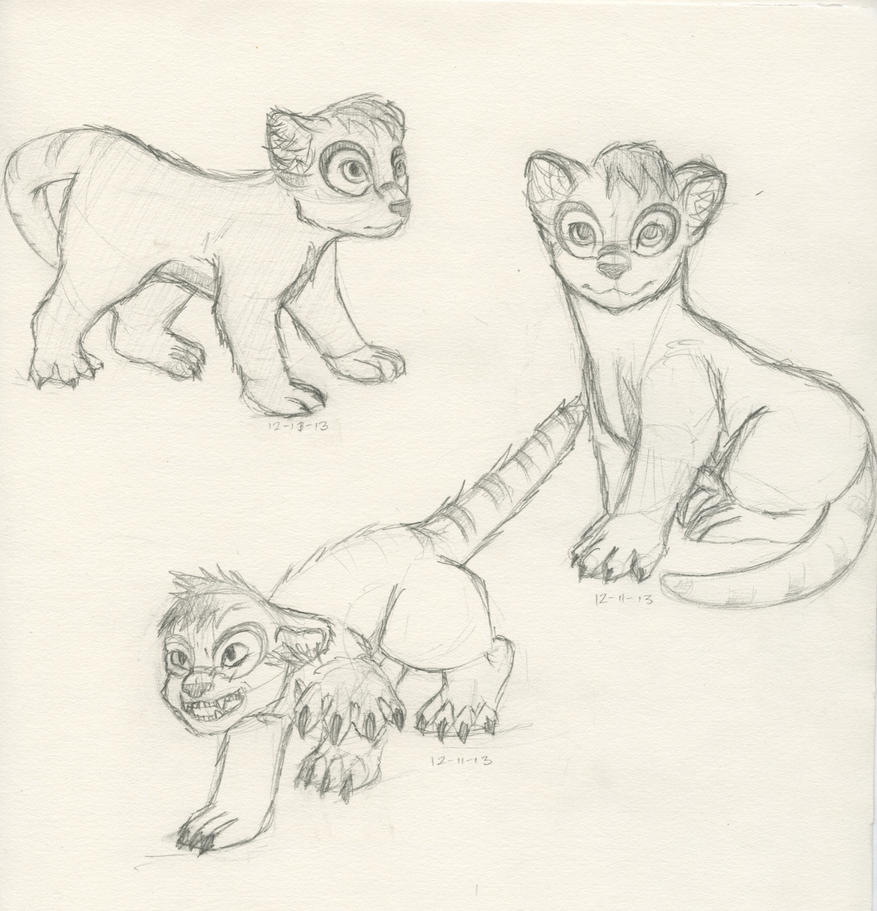
I wanted to share with you a commission that I've been working on: a fossa. The commissioner wanted to get a special gift for someone and I was challenged with creating that someone's fursona. I've never done anything like this before, and as I'm working on it, I remember why markings make sewing much more involved.


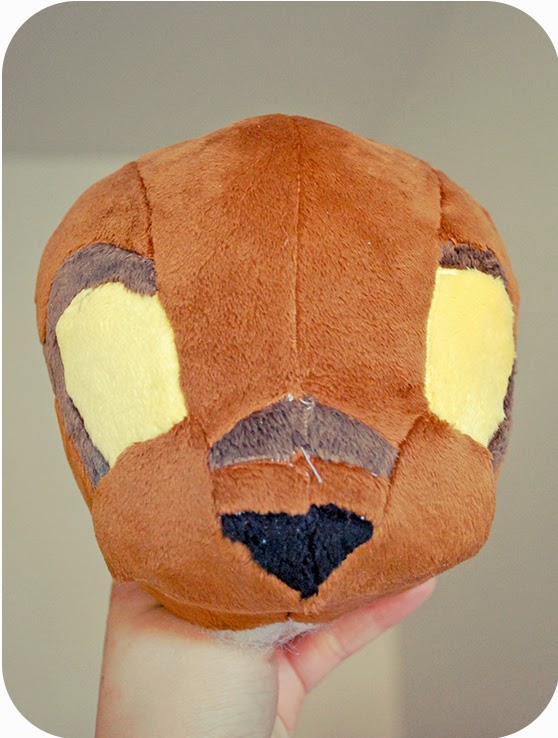
I started about a month ago with two prototypes for the head. This was the first time I was trying for cheeks without an needle felting involved. After a little frustration (ok quite a bit) I ended up with something that has face markings. Overall the head consists of 31 pieces of fabric and amber glass eyes. A quick note: face markings tend to make things difficult to sew if they are not embroidered.  
 After assembling the base for the head, I needed to do some needle sculpting and cleaning up to define the shape of the face and also put the head joint in.
Needle sculpted and with eyes in

Hair, ears, and ear fluffs added

I don't think these photos do the head justice. The shape and eyes have so much more depth in person.  The next step I'll be taking is to make the pattern for the limbs and adjust the body pattern a little before cutting it out and assembling it. It's definitely one of my more ambitious projects and I hope to be done by the end of May.

Saturday, April 12, 2014

Introducing Spring Serendipity


To adopt her: please contact me at paeoniadrop@hotmail.com

Spring is finally in the air. Where I live that means we went from snow to 80 F weather in the blink of a week, but that's nothing to deter me. She is the second piece in my "Four Seasons" line (name still pending some change).


It actually took me a little playing around to decide on her final color palette. I knew I really wanted to do warm palette, but it took some deciding before I finally settled on pink and orange for her colorway. The ombre is much more gradual this time, with her ears fading into her body to gradient down to an orange just as her body is changing to orange. Even her little legs fade from a light to darker orange on their way down.

With the actual doll, I started with her multicolored hairpiece, and 3 hours and a good number of petals later, I had the base for her personality. I envisioned her as a blooming flower and a little bit of Venus in a half shell. (Which I tried to capture in her standing portrait)
Lily details on the ends of her collar ties


Hand sewing adds a sweet subtle pseudo scalloping on her collar

This was also the first time I documented the entire needle felting process (which I may add to my patterns later). I've never attempted it before because I need both hands to control the wool as I add it to her face, but hopefully they will provide those who want to create their own bunnies with more of a clearer picture of my process. I think this little add on will contain at least 10 images. (Pattern can be purchased here: http://paeoniadrop.storenvy.com/products/6064828-chubby-small-bunny-pdf-pattern)

Anyways, I hope you enjoy her and look forward to my Autumn and Winter inspired pieces

<3 Laine


Saturday, November 16, 2013

My Jointed Ponies: The Story Behind My Ponies

Growing up, the My Little Pony commercials definitely drilled the theme song into my head. It wasn't until 2012 though, I actually watched the pilot of the Gen 4 Series: My Little Pony Friendship is Magic. For those who know me, know that nothing draws me faster to a cartoon than a soundtrack and aesthetics and MLP FIM had both.

After watching the series, I really wanted to make a pony plush, I did some research and saw that I could not come close to the custom MLP plushes that were already available. All I had was fabric, embroidery needles (I like to sew with these), thread, and my hands. I had no embroidery/sewing machine, hadn't even heard of stabilizer at that point, and could not satin stitch the strands of the mane and tail, but regardless I was going to figure out something.

4 prototypes later, I realized that one of my weaknesses is one piece bodies, so I went to make it the way I knew best: jointed dolls. I lacked an embroidery machine and hand embroidery on minky was a struggle for me (given that there is fur you have to hide with the thread). I put in glass eyes, shaped eyelids with some wool, and designed manes to match their filly times hence eliminating the needle to embroider anything!

A few more prototypes later, I was able to get a doll that had the proper hock, would stand, and was proportioned correctly. Upon the completion of my first pony: Fluttershy, I realized that the body wasn't as suited for the legs, so I changed the shape of the body gusset to emulate  the effect that was achieved by the one piece doll.

Each doll's mane and tail are assembled by individual pieces of fabric to give the appearance of strands in the mane and tail. The amount of painstaking hand sewing work has made me want to throw the towel in a few times, but I'm glad I haven't.

So far the fruit of my labors has resulted in 6 character ponies and 1 over-sized custom unicorn.


Fluttershy
Rarity
Twilight Sparkle
Rainbow Dash
Princess Celestia
 Princess Luna

White Unicorn Commission

Luna and Rarity are still available
http://shadowedporcelain.deviantart.com/art/Vintage-Rarity-2-Available-362360861
http://shadowedporcelain.deviantart.com/art/Vintage-Luna-AVAILABLE-387074739

All others have found homes.

I hope you enjoyed them!

Saturday, September 28, 2013

Adventures with a Sewing Machine


Another cloudy weekend morning where I have to go into work. I have actually been more interested in working on this commission than crunching some data and struggling with the new assay we are using in our lab. My boyfriend got me this little machine. Having never machine sewed, I did things via trial and error. After 1/2 a spool of hand sewing thread, I figured out a couple things:
-I can't use hand sewing thread on a machine
-When bringing up the thread from the lower bobbin, I need to actually pull out the loop, not maintain it
-I can't get good tension with super thin fabric
-Although there are techniques for sewing round pieces without pinning, for a first time user, it's better to use pins

After a couple of hours figuring it out and finally getting the tension right, I started working on this unicorn. I have the head, legs, and body sewn. Now it's just waiting for ears, mane, horn, and eyes. I put my finished kitten next to it to show the scale. Both are private commissions.

Hopefully after my project due on the 6th, I'll have more time to work on dolls.

Monday, September 9, 2013

Starting a New Kitten

(Yes this is my small and slightly messy workspace for my soft sculptures. I have a laptop for entertainment, beading wire & duct tape of some sort for armature, jewelry plyers, darning needles, embroidery & fabric scissors, hemostat, tweezers, isopropyl alcohol for clay work, tea and magnesium for headaches)

It's cloudy outside this morning which makes it a perfect time to blog. I actually meant to write this yesterday, but didn't get around to it. The commissioner requested that this kitten be able to reach up for something, so I put my hand to understanding and working armature. This is my first time trying to wiring the limbs and tail, and while I had a general idea of how it was done I could not figure out the specifics on how to get the wiring to stay in one place while stuffing. I went searching in other places and became especially curious on how artist dolls (dolls with resin heads and limbs, but soft pose-able bodies) were assembled. Luckily, Magweno (magweno.com) had an old tutorial that provided some insight. The solution to my problem was to wrap the armature in quilt batting so that I would not have to stuff it afterwards. I would sew one side of the arm, flip it, put the batting wrapped armature in it, and ladder stitch it closed. I am not sure yet if this is more time consuming than how I usually work, but it works very well. The armature doesn't shift and I'm able to pose the arm as I like.

Since then, I have started prepping the face for needle felting, and will work on the later in the week when I have more time. Mondays and Tuesdays are always the busiest days for me.