Wednesday, October 22, 2014

Convention Madness & Mixed Feelings

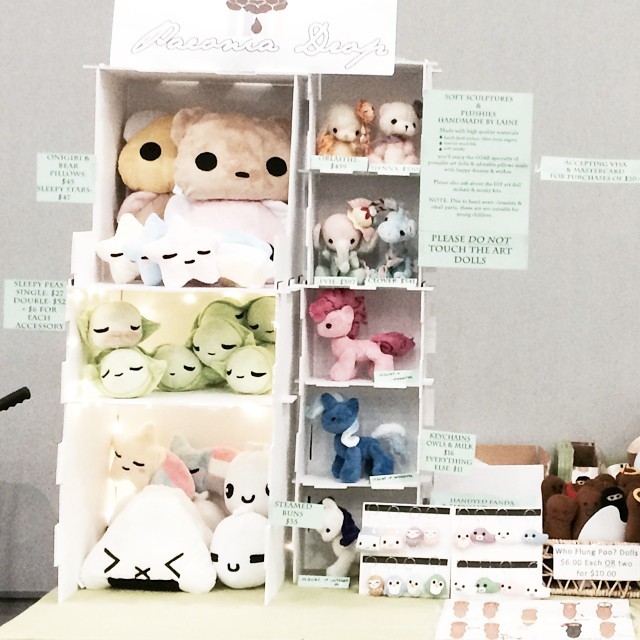
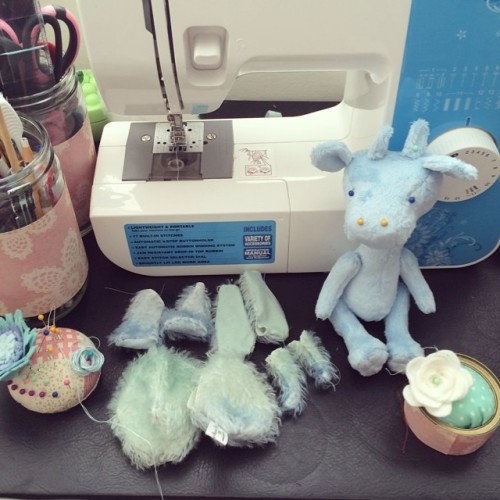
Everytime I encounter an obstacle in my part time budding career, I can only throw more and more admiration for those who keep up extreme work ethics. I have been juggling the constant balance between my own life and two families. There's only so much of me to go around, but 2 more of me or even another clone might be helpful. I have quite a one track mind which works for thorough work, and an additional few clones would be lovely. After spending time with my mother and grandmother in August, I went into a mad dash to prepare for Anime Weekend in Atlanta. This regime involved an unhealthy diet, building my own display, cutting, sewing, and assembling 39 peas, corresponding pea pods, 25 bear pillows, 29 shooting stars in too many colors, 9 onigiri, and 6 steamed buns.

Beginning of convention prep


Final Display!

After a month of 12 hour work days for days straight with no break, I was quite happy with the overall look and portability of my product and display. It was a great improvement from my first attempt at conventions with dolls in cellophane bags.

This was the second time at an Anime convention, as I am still trying to find my sea legs in the offline crowd. I aimed for a different price range after seeing the price sensitivity at Otakon 2013. I went for a variety of handmade pieces from 11 to 45 USD and then the upper end of 355+ USD for the art dolls. I have yet to crack the code for Anime Conventions and probably will only attempt 1 or 2 more before trying a different crowd.

It is wonderful networking and you get your name out there to people that you would otherwise have not met and you get to spend the weekend with wonderful people and get to tell stories about waking up at 2 in the morning due to convention shenanigans.
Hotel Evacuated!

All said and done, even if you try to find the silver lining in the cloud, it can be quite disheartening to put in all those hours of work and only make 11 sales. I know there are challenges and many artists go their entire lives without making it. Even so, none of this helped to lessen the disappointment. For a while, it made me question if I should just scrap it all and start from scratch.

Something else that was not helping was people meaning well to give me advice. I know they meant well, but I had given my business a lot of thought. It was not an overnight spur of the moment thing. I had thought about how to reduce production cost, thought about manufacturing, balanced my books, thought about my resources and what I can and can't do. After the 10th time someone's told you, "now if only you could have this manufactured" you have to take a VERY deep breath and explain that this is OOAK work, not to be mass produced in China. While I have thought of other branches, I also decided to do research but that it would be a long time before I would have the capital to give it a real jump start.

I really admire those in the art/entertainment business because you only have to wonder how many no's they had to hear that yes. It is really about just sucking it up and picking yourself up by those bootstraps, but one thing is for sure, I cannot cut back on labor costs. This is as cheap as it'll get. If anything, I will be raising prices pretty soon because I am not a factory or a general worker, I am an artist with a specialized skill.

Friday, August 8, 2014

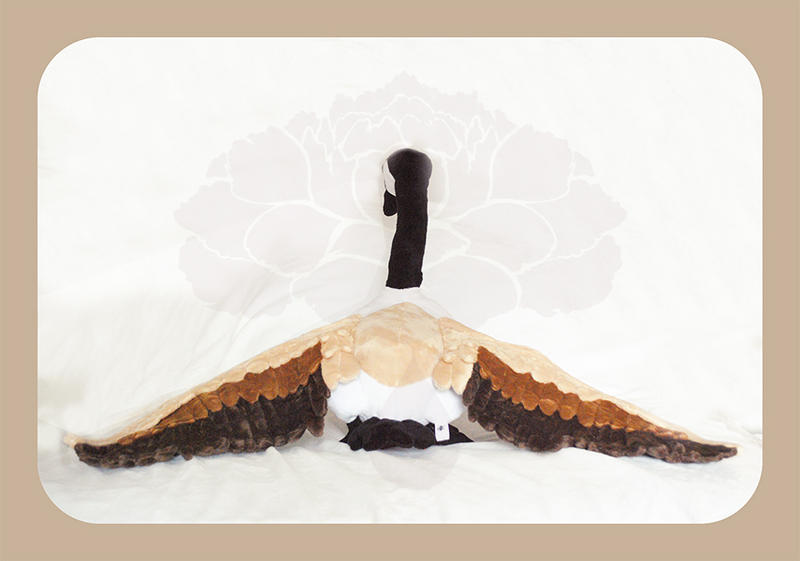
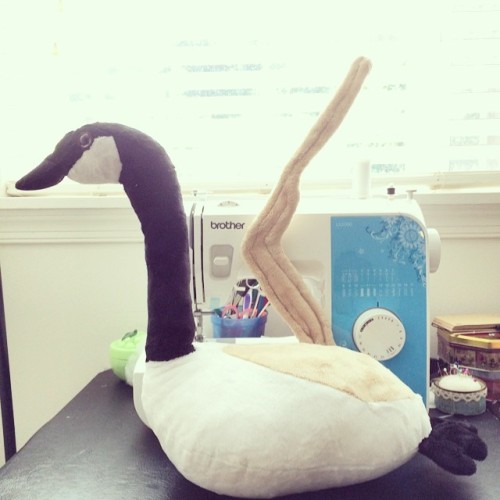
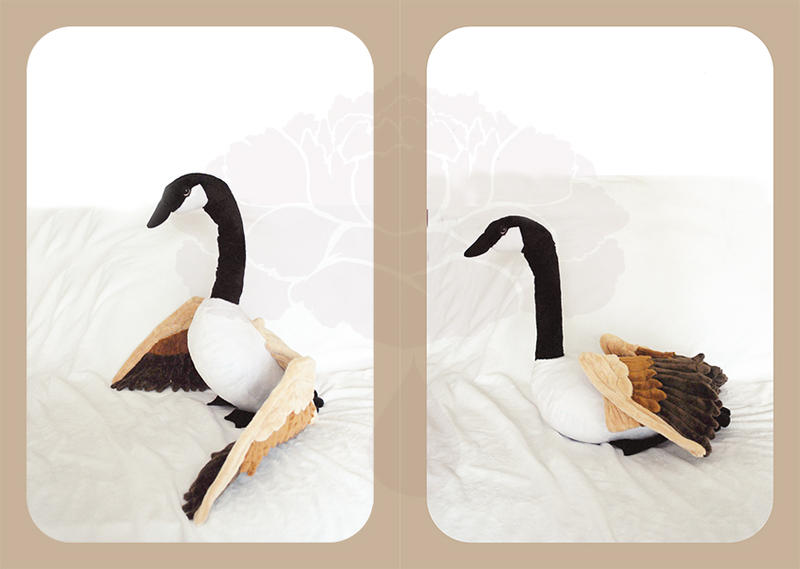
A Realistic Styled Canadian Goose: My Process


Oh I had to rest a day or two before I could even summon the strength to write this. I first started this project a month ago and came up with a plan:

  • ultrasuede beak & feet
  • pose-able anatomically correct folding wings
  • armatured neck and wired feet
I gathered a variety of photos of Canadian geese in different poses, looked at plush birds, and finally looked up wing anatomy. 

Goose body with one wing structure
I started with the head first before making the  body and estimating the distance needed for the neck. I had sewed the minky part of the head together with the intention of being able to machine sew on the finished beak. Alas that wasn't possible given the tough to pin nature of the ultrasuede, so I had to settle for hand sewing it. I bent 2 straight needles and just had to give both my hands a rest from the stress of sewing through layers of ultrasuede. 

Upon finishing the head, I noticed that a goose's body has a gradation of colors, so I chose three tans/browns to use for the wings. The commissioner had requested for something more huggable than a doll for display so I decided to do the main structure of the wings with wire. I had played with ideas of steel spokes already made to bend, plexiglass, and foam core, but none of these suited my use. 

To make the wing structure, I bought 12 gauge aluminum wire and with a sketch I drew of the bone structure, I wrapped one wire around the other to form a stronger wire that will stand up to much posing. The downside to that is when I went to sew the wire into the plush lining, every time I hit a wire, I broke a sewing machine needle. It ended up being the limit to my machine's foot with two pieces of minky, quilt batting, and a thick wrapped wire, but using a total of four pieces (two for the outer most structure and one more for the inner bottom) and several hours later, I had two complete wing structures. 
Start of feathering with two of the colors
Now time for the feathers: It was my first time attempting this sort of wing, so I did not really have a plan for where to start feathering. I decided to do it in four sections according to where the wing would need to bend when the wing would close. I used the middle to provide a sense of scale and also because the wing centered around everything else folding over the middle. 

Next up: outer section

Finishing up with the inner section & another bent needle
It is important to note that I drew feathers of varying shapes depending on where in the wings they were. I had looked at drawings of feathers and was warned by anatomy books against using just one single pointed shape. The shapes of the feathers ultimately helped shaped the overall structure of the wings for a finale that I'm quite pleased with. The inner most part blended perfectly with the tan back I had originally incorporated in the design


Finally the last part was to do the "drumsticks" and legs.
Attacking the legs
This was fairly simple: using the same 12 gauge wire, I wired the legs and stitched the wire into place using my machine, then had the lovely task of hand sewing the wired legs to the body. First I attached one side to the body, following that with the unstuffed drumstick. By sewing the drumstick over the legs, I had the legs attached to the body on one side and the drumstick on the other and once stuffed, the drumstick provided structural support for the legs. 

The finish project measured 20 inches from beak to tail and 1 yard/meter in wing span. I had crammed the remainder of the project right in after I got the boxes from my old apartment into my new and sewed for a minimum of 10 hours for 5 days straight in my desire to finish this (I actually would forgo eating just due to concentration) I learned a lot about wire, quilting, and ultrasuede in this project. I'd have to say I am well exhausted and have no desire to attempt such a project until I recover, but it was definitely an experience. 

I'd like to thank the person who commissioned this! Each piece is always to learn more.

Now for some brunch and possibly some livestreaming later.
Have a wonderful day and thanks for reading,
Laine

Thursday, July 17, 2014

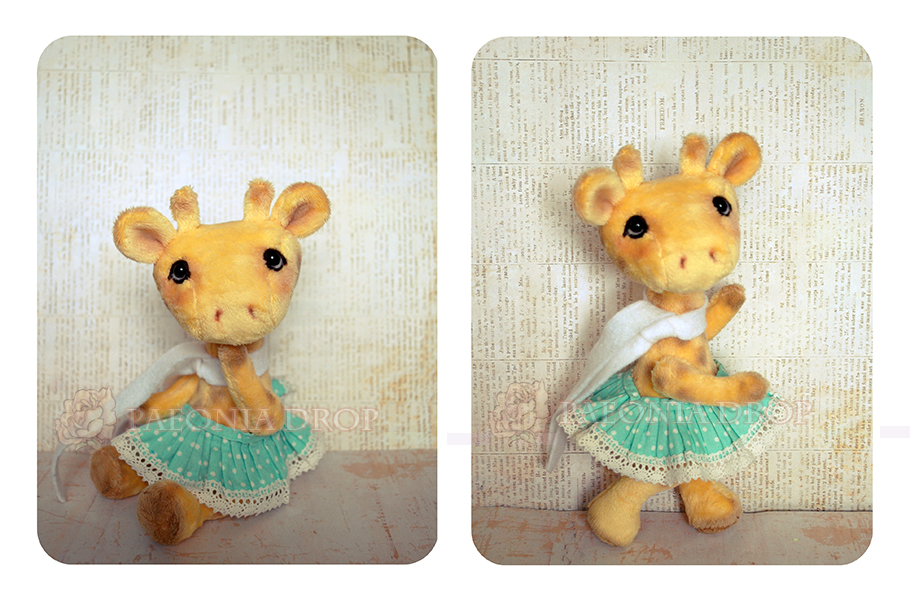
The Story of A Blue Giraffe Named Clover

Clover's story probably best begins with Christmas last year when my friend Kimmymanga sent me the most adorable pens.

I never really thought about it extensively, but this blue giraffe definitely provided me with enough gumption to make another giraffe. It was also because I had heard from my talented friend Nyssa that she'd be giving the idea a go. 
Blue Giraffe Commission by Nyssa
It just sounded too adorable to pass up, so I set out to have the pieces cut and the majority of the machine sewing done before I left to visit fiance and family in California. Sadly, in my scramble to pack and clean, that did not happen, and in the time I spent there, I only managed to get the head hand sewn. It was a first for me not to be sewing my way through the long layovers, but spending time with friends and family sometimes needs to come first. 

Something I realized was that our time with the special people in our life is really what means the most. Often I keep myself isolated from those offline. I have just retreated to being a person behind a screen, and it was a wonderful change to take the time to have conversations with family, go jogging, and just be beside them to talk, play, or just enjoy their company. 

When I was finally ready to finish it, I had run out of eyes, so for a while, he was sitting looking quite sad with me, but I was already starting to love him. I took the time to needle sculpt his feet to give him hooves, and it was just the right touch. 


Today I finally had it in me to just finish him. As I was working on his eyes, I realized he had the kindest eyes I have ever felted. Something about them just spoke to me. Originally, I had intended to make a gentleman character to match the last giraffe I created, but he was just so guileless, like a child.
My last giraffe: Georgina
 I still had every intention to dress him while I was shading him, but by the time I finished, I set him down and he just looked at me, and told me he didn't need to be dressed.
The back of Clover as I added his markings
And so here he is now.

 For added warmth to compliment his cool tones, I added a warm golden brown to his ears and cheeks instead of my usual pink blush. He really made me feel at peace when I finished him. I hope you'll enjoy him as much as I have. He is looking for a home, so please feel free to click here if you are interested in adopting him. (All materials are also listed)

Thank you for reading,
<3 Laine

Wednesday, July 16, 2014

4 Projects at Once

In the past, I've never had more than one project open at a time. Sometime over July 4th weekend, I ended up running out of eyes and needing a couple other things to complete commissions, so naturally I put my current project (blue giraffe) on hold and my goose commission on hold to start more con prep and when I wanted a break from that, I started doing some sewing for my second commission.

 LO AND BEHOLD, the package with all the things I ordered came that day, so I was more than torn in a few directions. I didn't like having multiple unfinished things at once so I settled in and spent the good remaining of the day finishing what was closest to completion: 5 shoot star plushies to go with the original

Then I wet to approach my largest priority: the Canadian Goose

After working two full days of 10+ work hours, I had the head done right, ultrasuede beak on (nearly killed my wrists), neck made with skeleton, body sewn and stuffed, and the beginnings of a wing in progress. I'd have to recommend to those who use wire not to twist two pieces of 12 gauge wire together and then try to get your machine to hem it in. I broke 2 machine needles because the wire wasn't twisted 100% uniformly (and you can't see it under the minky). There were times when I was chugging along, that I would just hit that twisted wire and BAM off it snaps and usually I have to go in with tweezers to remove the broken portion out of sewing. This task actually can prove to be quite tough given the thickness of the minky+batting+wire. I thought about sewing it, but the wings themselves are quite large to begin with. If I were to annotate through my process,this post would get too long.

In the end I compiled a mental pros and cons list in cause I ever decide to have so many things going on at once:

Pros:

  • There is variety, so you can keep your interest from waning by working on a few things at once
  • Can increase efficiency (do all your cutting at once, sewing, assembling)
Cons
  • Can feel overwhelming esp to people who require certain amount of control in their life to function
  • Can lead to being distracted because you DO have the option to work on multiple things
All in all, I'm trying for less structure when it comes to myself and doing things more with my energy levels. Once I finish these I will probably go back to my original arrangement, but it was definitely interesting (and stressful).

Question for you: Do you typically work on one thing at a time or multiple projects? I'd love to hear your pros and cons list.

Until next time,
<3 Laine

Sunday, June 29, 2014

The Conclusion of "Four Seasons of Ombre": Autumn Aria & Winter Waltz


Hi everyone,

It has been a while since I wrote a post. Between finishing the Spring Semester and visiting family, I have been bouncing all over the country. During my actual travels, I did not get as much sewing done as usual because I chose to spend more time with people than dolls. It was actually a first for me. I usually get so much done on trains and planes. But without further ado, I'll introduce Autumn and Winter:

Autumn Aria:
Autumn Aria is inspired by the forest and warmth of the changing of colors. Originally, I was very nervous to use vivid saturated colors, especially those in red. With the encouragement of Paula (from http://www.allbearbypaula.com/) who took the time to show me some of her vividly colored bears, I was able to take the plunge and dye the lower half of Autumn a cayenne red. Naturally being fall, I thought of school, so her sailor collar and headpiece reflect that of a school girl's.

Being a little heavier on the top, she was a little harder to photograph than Spring and Summer.
-------------------------------------------------------------
Winter Waltz

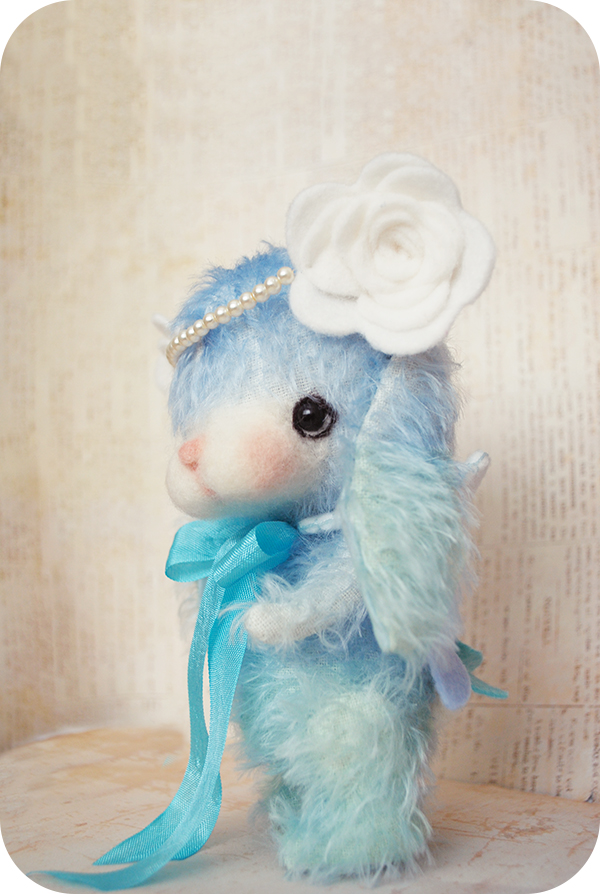
With this little fairy, she's full of longing to sprint and play. She is made of blue and a teal/kelly green ombre. For the longest time, I didn't know if I would make her a princess, ice queen, fairy, rpg inspired etc. Eventually I settled on something other than the conventional blues and whites of winter. I incorporated greens from the ice palace of Jessica Day George's Sun and Moon, Ice and Snow (a retelling of a Norwegian folk tale).

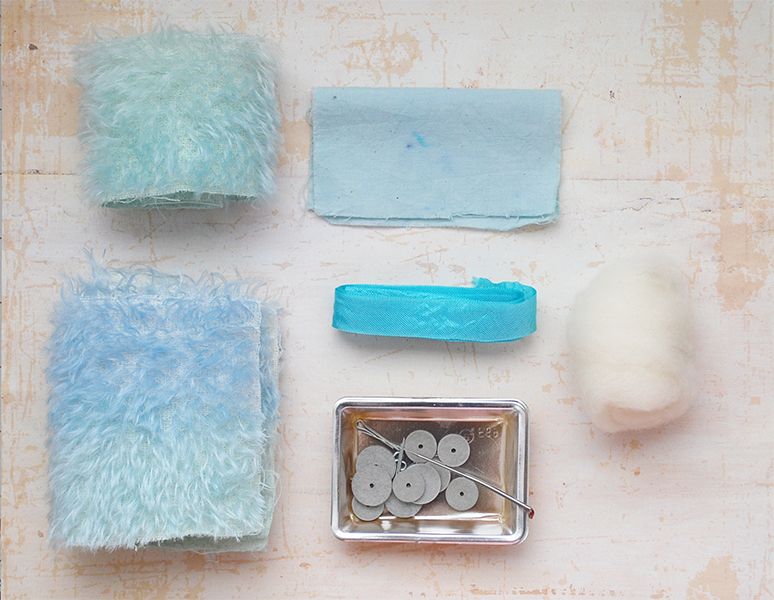
Armed with a new phone, it was much easier to take progress photos. As much as I love my DSLR, it can be quite heavy on the neck and hands during extended times. From sewing to felting, you can go step by step with me. I also had the pleasure of livestreaming the face felting for a few people. In the middle of the night, I had to remember how I made felt roses the last time and after 3 that were scrapped, I got the hang of it again.


Then the most important parts of her story: the wings and collar. Inspired by the high collars seen on queens in animate movies, I made a high back collar with a ribbon tie. I debated on how to add her wings and eventually settled for attaching them on the collar. They can be moved and pinned to show various stages of flight.


I can just see her reaching for the sky.

Now I have come full circle with Spring, Summer, Autumn, and Winter. With each piece I tried something that I've never done before, and I have to say, overall, I am pleased. I will have to take a break fro making bunnies for a while.

Until next time (a Canadian goose),
Laine

Monday, May 5, 2014

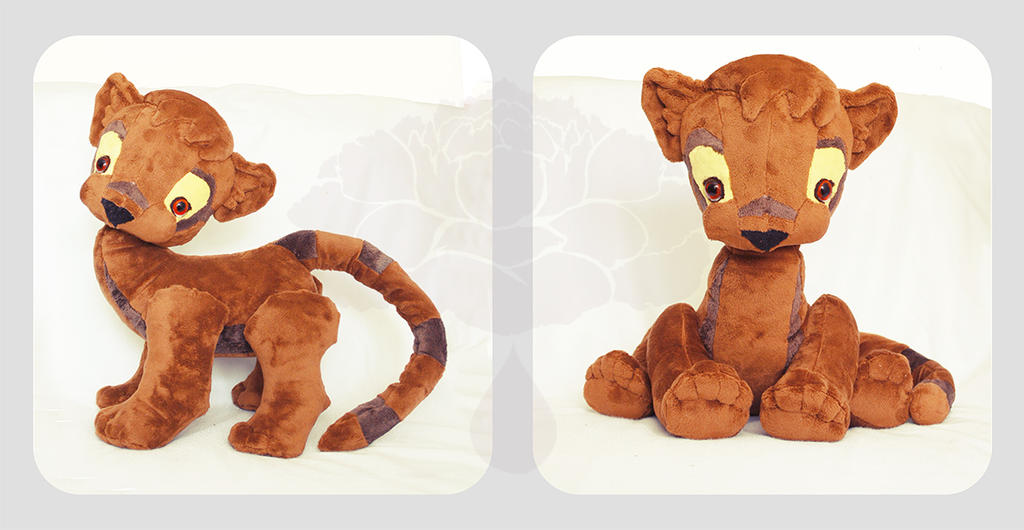
I AM FINISHED! Fossa Commission Reveal


I am so happy I finished this that I want to fist pump into the air and do a victory dance (which looks like I'm just having the fits). To see the process of the head please visit http://paeoniadrop.blogspot.com/2014/05/moving-one-step-at-time-commission-wip.html

Once the head was done, I tackled 32 more pieces to make the body. The body had markings down the chest that also had to be visible from the side. The legs needed hocks that were more curved on the hindlegs and not so much on the front. Before starting the project, I was a little daunted by the idea of having to needle sculpt toes, but I quite enjoyed it. I think it was especially helpful since I waited until after I finished shaping the feet to stuff the leg. Working with a partially stuffed leg gave me the flexibility to rework the stuffing into the toes as I was shifting it around to get the five digits.

Before and After Needle Sculpting
Something I do have to figure out is the neck. In order to have the head firmly stuffed so it won't deform, it ends up being quite heavy. I used a larger neck joint this time to give more support, but the head is still not as well supported as I would like. Because the commissioner did specify that she wanted it to be as huggable as possible, I really did not want to put in heavy weight interfacing to give it more structure. It would just feel stiff (like hugging cardboard.) I will one day have to figure out a solution to balance hug-ableness with structure. Until the next time I tackle a large quadruped plush.

(Next commission up is a Canadian Goose)

Thursday, May 1, 2014

Moving one step at a time: Commission WIP

Good morning everyone,

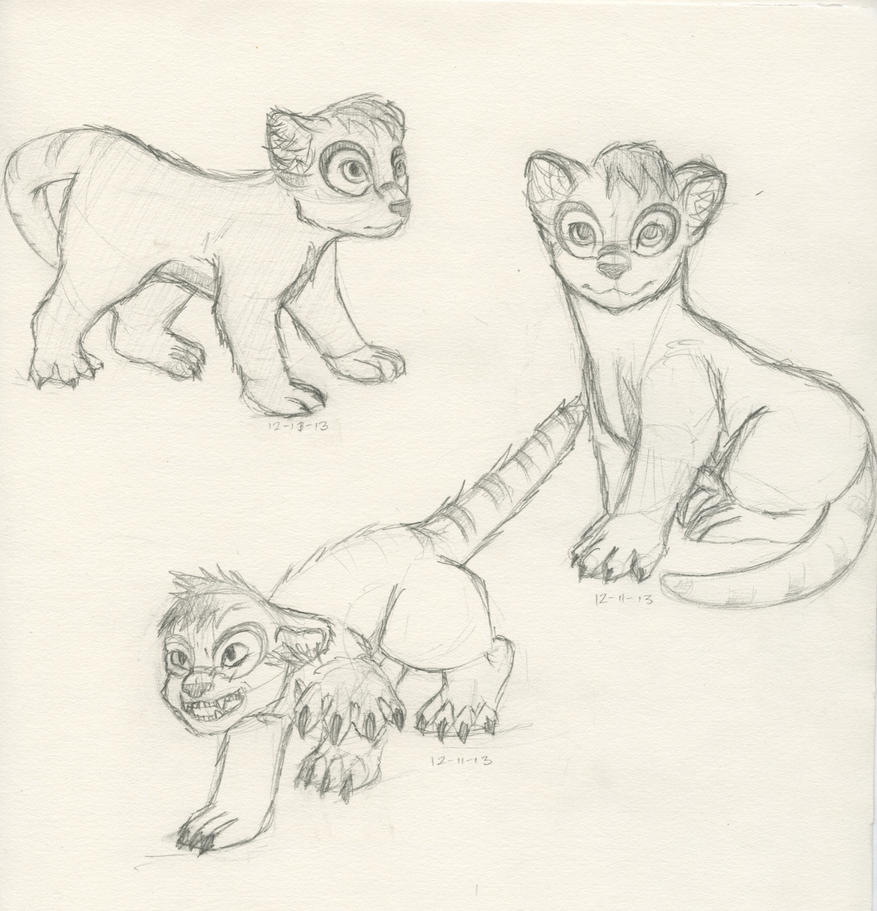
I wanted to share with you a commission that I've been working on: a fossa. The commissioner wanted to get a special gift for someone and I was challenged with creating that someone's fursona. I've never done anything like this before, and as I'm working on it, I remember why markings make sewing much more involved.


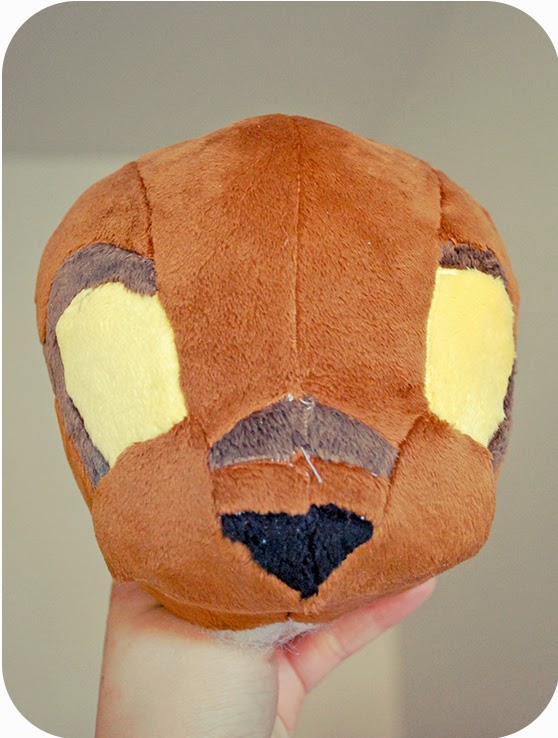
I started about a month ago with two prototypes for the head. This was the first time I was trying for cheeks without an needle felting involved. After a little frustration (ok quite a bit) I ended up with something that has face markings. Overall the head consists of 31 pieces of fabric and amber glass eyes. A quick note: face markings tend to make things difficult to sew if they are not embroidered.  
 After assembling the base for the head, I needed to do some needle sculpting and cleaning up to define the shape of the face and also put the head joint in.
Needle sculpted and with eyes in

Hair, ears, and ear fluffs added

I don't think these photos do the head justice. The shape and eyes have so much more depth in person.  The next step I'll be taking is to make the pattern for the limbs and adjust the body pattern a little before cutting it out and assembling it. It's definitely one of my more ambitious projects and I hope to be done by the end of May.