Sunday, April 27, 2014

Little Dreamer Bunny


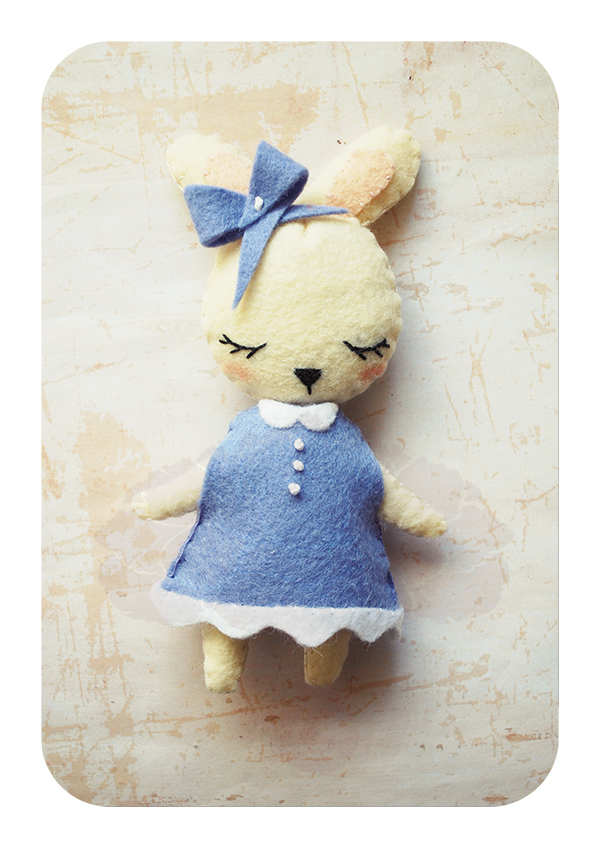
I was feeling nostalgic for paper dolls and all the little things from childhood. The drive behind a lot of my work is to bring back that feeling of childhood as an adult. I designed her body in mind with the combined inspiration of ball jointed dolls and paper dolls.

While her outfit is removable, future ones will not be removable. I find that making the outfits part of the doll gives me a lot more freedom with detail. I can make things more or less intricate as I see fit.

For me these are perfect for times when I do not have a sewing machine. As I'll be quite a bit of traveling in the next two months, I'll be bringing these onto trains and airplanes to sew. All the supplies fit in a little ziplock bag and it takes so little stuffing that I do not have to mess with many pieces in a confined space.

Saturday, April 12, 2014

Introducing Spring Serendipity


To adopt her: please contact me at paeoniadrop@hotmail.com

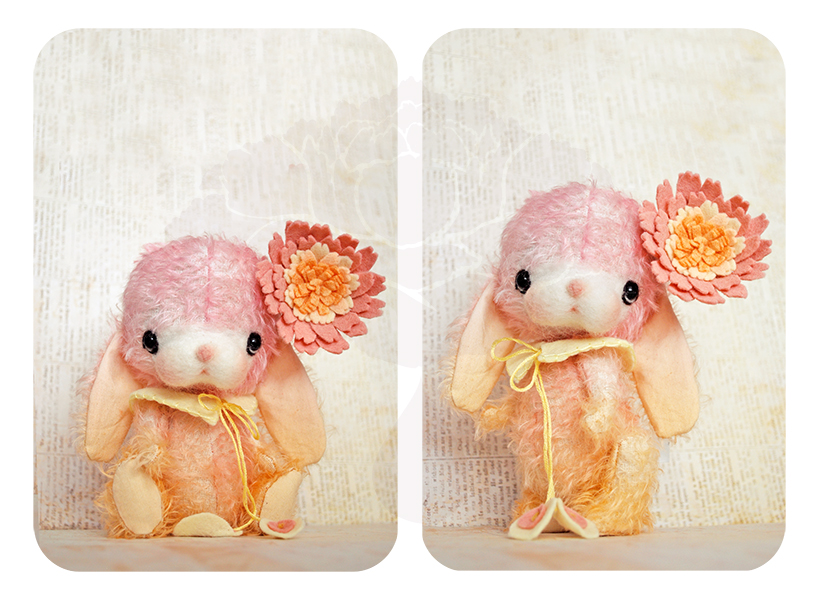
Spring is finally in the air. Where I live that means we went from snow to 80 F weather in the blink of a week, but that's nothing to deter me. She is the second piece in my "Four Seasons" line (name still pending some change).


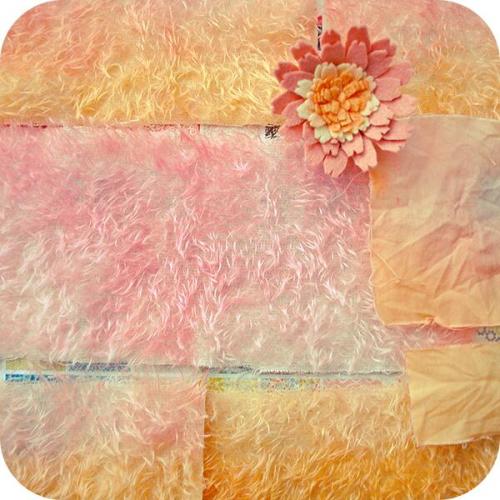
It actually took me a little playing around to decide on her final color palette. I knew I really wanted to do warm palette, but it took some deciding before I finally settled on pink and orange for her colorway. The ombre is much more gradual this time, with her ears fading into her body to gradient down to an orange just as her body is changing to orange. Even her little legs fade from a light to darker orange on their way down.

With the actual doll, I started with her multicolored hairpiece, and 3 hours and a good number of petals later, I had the base for her personality. I envisioned her as a blooming flower and a little bit of Venus in a half shell. (Which I tried to capture in her standing portrait)
Lily details on the ends of her collar ties


Hand sewing adds a sweet subtle pseudo scalloping on her collar

This was also the first time I documented the entire needle felting process (which I may add to my patterns later). I've never attempted it before because I need both hands to control the wool as I add it to her face, but hopefully they will provide those who want to create their own bunnies with more of a clearer picture of my process. I think this little add on will contain at least 10 images. (Pattern can be purchased here: http://paeoniadrop.storenvy.com/products/6064828-chubby-small-bunny-pdf-pattern)

Anyways, I hope you enjoy her and look forward to my Autumn and Winter inspired pieces

<3 Laine


Sunday, March 23, 2014

Giveaway Winner & 48 hour offer

Thank you everyone for entering! There were a total of 17 people on my email subscribers list, so each person had a 1/17 chance of winning! Anyways without further ado, the winner has the email la****se@gmail.com. I've contacted you via email and you have 1 week to reply with your address. If the winner does not reply, I will draw another name. (The reason everyone's email address is starred out is so no one will have their privacy disturbed and they will not get spam from entering this giveaway.)


For those who did not win, I still have a little treat for you. For the next 48 hours, I will be giving away a free pattern with each plush kit purchased. You can pick from the already premade ones or request a custom one made just for you. For more information: http://fav.me/d6ntq9o

Thank you for entering. Don't despair if you didn't win. I will still have other giveaways throughout the year. (Maybe even a little mini plush pillow)

Stay tuned and I'll be posting WIPs of my latest commission soon,
<3 Laine

Tuesday, March 18, 2014

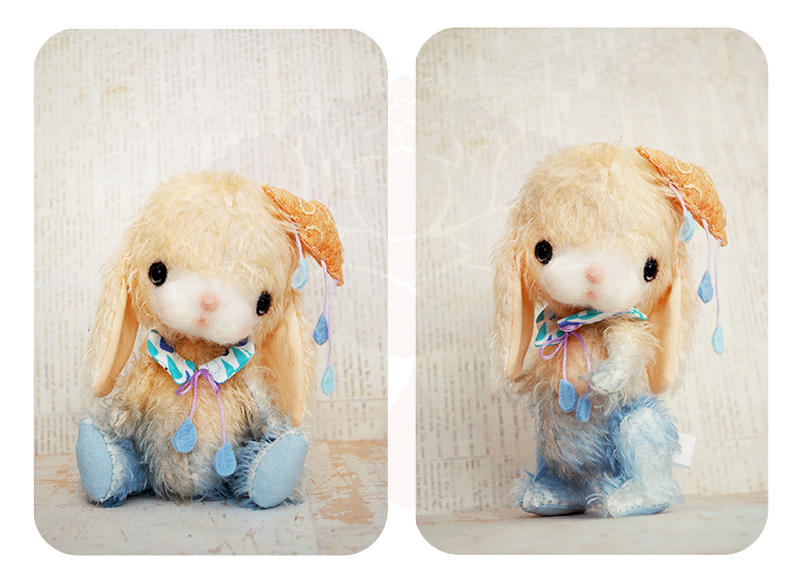
Summer Showers


I'm so excited to be able to introduce you all to Summer Showers. This was the first time I had a name in my head for the doll before it was even made. Usually I have to wait to see that face and get that feeling, but with her, I just knew.

I loved being able to share my process with everyone.(Her "Making Of" Post) I really liked being able to carry the motif of a fresh summer shower both in her accessories and in her colors. This was the second time I worked with gradients, and I really wanted to show many different gradients in her body (like an ever changing sky). You can especially see it on her back, where there are 3 areas where the color is allowed to fade as well as a surprise splash of blue on her head for a bit of whimsy.
Look at all those gradients!

Such a chubby little body & her magnetic little hair clip
I kept her face softer and rounder than all the other ones I have done before because I really wanted all of her to reflect that softness and warmth that I associate with summer. I instead of just rounding her eyes this time, I did pull down the top eyelid for a more feminine expression.
Close up side view of her face
Well that's it for mohair for now. I need to get my tuckus back on the commission track. Next up a Foosa. This should be quite an adventure for me. Can't wait to share it with all of you.

<3 Laine

Sunday, March 16, 2014

The Making of "Summer"

I had the thought for Summer a two weeks ago walking home from the doctor. My appointments usually finish around 4.30 pm, and the sun was just starting to go from blue to orange. I had just finished Chester, so I didn't have the intention of making another piece before finishing my commissions. I was still feeling very lost and frustrated with my life and the lack of progress I was making in discovering myself.

When I finally worked for a good day, I started working on her. I hadn't realized it's been 9 months since I last made a rabbit, so I felt it was due time.

I actually want to be able to share Summer herself with you this weekend, I had a bout of ill health that set me back an entire day. It was the kind of bad day where you couldn't even watch tv in bed. I literally had to sleep or at least attempt to, and my head felt like bruised fruit, and my eyes hurt and it was all miserable.

I wanted to share with you all I have done so far and in a more comprehensive manner than when I did Chester's WIPs. She's almost complete, I just need to needle felt her face and tail and finish off her accessories.

Color Palette For Summer
Inspired by the setting sun, I loved the orange and blues, so I wanted something that reminded me of the summer showers that happen so often where I live, where it's warm one moment and stormy the next. Flashes of rain and warmth inspired this piece.

Summer's Dye Job
Summer's mohair was dyed in an array of gradients. It was not done in a very exact manner and was meant to have a more natural and gradual transition from the daytime to night sky.

All pieces sewn together
In her head, I've added a small magnet to hold up her little cloud hair piece.

Stuffed but not yet assembled
Assembled with variable gradients visible
Face prepped for needle felting & with glass eyes


Now for some Spring cleaning and school work before I find some time to finish her up.

Edit: She's complete
Face felted, ears pinned
Finished little lady


Friday, March 14, 2014

Chubby Animal Line Mohair Kit Giveaway

To celebrate the opening of 
MY STORENVY SHOP
 & the release of the patterns of my fox and giraffe, I'd like to give everyone a chance to make their own adorable chubby animal. You'll receive a CUSTOM mohair kit that contains the following:
An example of what you could win!
♥(10.5 in x 13.5 in) 5 mm sparse hand dyed mohair (color of your choice)
♥6 in square of cotton fabric (only enough for ears and foot pads)
♥7 mm black glass eyes 
♥5 cotter pin joints - 3x half inch joints, 2x 5/8 joints (for legs)
♥1 yard of ribbon/trim
♥Random Charm (Pick: Key, Crown, or Owl)
♥38 gauge triangular felting needle
♥0.1 oz of USA domestic top wool roving
♥Pinch of chocolate corriedale wool

To enter:
(Free Worldwide Shipping)
Must be willing to give me a shipping address)
Subscribe to my blog via email (top right hand corner)
Comment: what would you make with your new mohair kit

For an extra chance to win:
Purchase any of my patterns from storenvy
Each pattern = 1 extra chance to win

Bonus item:
If the winner of the kit also has made a purchase in my storenvy shop,
 I will include a free CUSTOM needle felted bunny pastry
Purchase must've been made before the drawing

Winner will be drawn from the email subscriber list on
March 21st
7 PM EST


Good luck everyone!


Wednesday, March 12, 2014

Tools of My Trade

I've been meaning to make this post for a while now but for one reason or another haven't. It's mostly because usually at the end of a project my desk looks like this:
 The level of chaos here is quite...remarkable. I have patterns sticking out left and right, a mug, sewing machine stuff (bobbins & needles) sitting on top, rubbing alcohol (even though I'm not working with clay), and it's just quite..chaotic to say the least. So after looking at that for a while, I really needed to clean it for my sanity's sake. After a cleaning makeover it looks like this.
Cinderella Pop Up Paper Cut Out was a homemade VDay gift 
I am quite limited in elbow room once my sewing machine gets added to the desk. When I'm hand sewing though, I like to take it to my bed. One thing I pride myself of is being able to pack all my sewing supplies for a single project into a 1 quart zip lock bag, so I thought it was a time to show you what I use and give a brief description of how I use them.

1. Sewing Scissors, 2. Regular Scissors, 3. Embroidery Scissors, 4. Hemostat

  1. A girl's best friend has to be these sewing scissors. I absolutely love them. When I originally started sewing I never used sewing scissors because they weren't worth the investment for me since I had a 3 dollar pair laying around, but the more fabric I worked with, the more stress my hands felt, and I simply needed them. I ONLY use these on fabric, ribbon, and thread and nothing else.
  2. I use my regular scissors for pattern making, cutting cardboard, cutting plastic nubs off plastic eyes, and lots of other miscellaneous things. 
  3. Curved embroidery scissors are useful for trimming threads in small tight spots as well as trimming the fly aways off my needle felting. The curve keeps the scissor from cutting more than it should. I pair all three of these scissors with a scissor sharpener which for 2-3 dollars saves you the cost of having to replace your scissors.
  4. Last but not least is my smallest hemostat. I have these in 3 sizes and with different tips but I personally prefer the curved tips. They act as a combination of tweezers with the leverage of a scissor. Mine generally have teeth on them for added grip and they are great for turning small pieces of fabric and stuffing. Choose the size that best reflects your projects otherwise you'll end up with a hand cramp.
    5. Felting Needles 6. Darner Needles 7. Pastel Brush 8. Paint Brush 9. Permanent
    Pastels 10. Doll Needles 11. Pin Cushion & Pins
  5.  Next up are my assortment of things I need to make the face of a doll. First off I start off with felting needles, and I have these in a variety of sizes for shaping and doing the detail work of my doll's faces. They have little barbs on them that catch the wool fibers to lock them into place in order to form a shape.
  6. I use darner needles to put in eyes and also as a substitute for an awl. They come in a variety of sizes and I use thick or thin ones depending on the size of the hole I need. For example, when I joint a doll, I pick the darner needle that is the same size of the pin so I know the hole I am making will be sufficient.
  7. This pastel brush has a sponge applicator that slides onto the pastel blade. I used this to add more concentrated amounts of color
  8. Camel haired paintbrush that I use to apply pastels when I want a softer feel to the shading. 
  9. Permanent pastels are chalk pastels that contain pigment with a binder. You can purchase these in sticks or already ground up (panpastels) I use these to blush my dolls and shade their faces, ears, and limbs.
  10. When I do any type of needle sculpting, I use doll needles of an appropriate length for ease of sculpting. Used in conjunction with a strong thread, this will give you control to create more depth for the eyes on a doll
  11. Most important thing for sewing and for marking. I like a flat bottomed pin cushion so the pins cannot disappear into the cushion. I use both quilting pins, normal pins, and the small tailor pins (the ones you see on men's formal shirts)
    12. Water soluble marker 13. Gel pen 14. Jewelry pliers 15. Fiberboard discs
    16. Tailor's Chalk 17. Sewing Gauge
  12. Water soluble markers (comes in white and blue) are always useful for tracing on your pattern or making any markings. Simply spritz with water after you're done sewing, and the color should fade. (Might want to test this on a scrap piece just to be sure. It's harder to get it off some fabrics)
  13. Gel pen for marking dark minky because nothing else will stick to minky
  14. Jewelry pliers are used to joint dolls. I have a combination one that also has a wire cutter. The tip of the pliers is used to curl the cotter pin
  15. These discs are half the team in a cotter pin joint. The pin itself is not shown. I use several sizes depending on the size of the doll
  16. Tailor's chalk (comes in white and blue). I use this to mark fabric when I want nice straight lines. It's water soluble but it should also rub out, so I find it is best to use this when the marked fabric isn't being extensively handled. It would be annoying to have to constantly reapply
  17. A sewing gauge can help check seam allowances, make small measurements, and just to double check markings. It has a slider to help mark the measurement
So those are all my essential tools. When I'm packing up my sewing to work somewhere other than my desk, I usually bring some combination of these 17 items in addition to fabric and thread. These are not all the things I use in my doll making, but I use these each time I make a doll.

Hope this mini guide can help you build your own tool set.

Until next time,
Laine