Showing posts with label wip. Show all posts

Friday, August 8, 2014

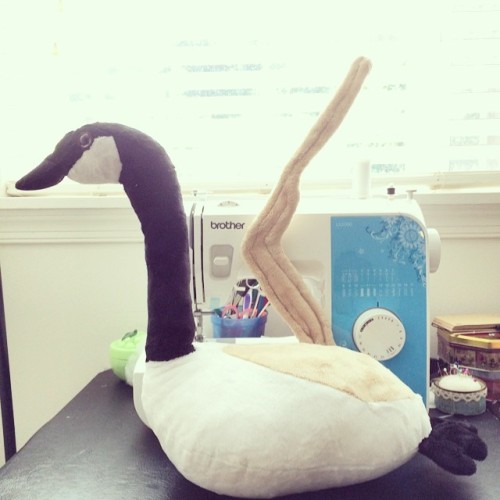
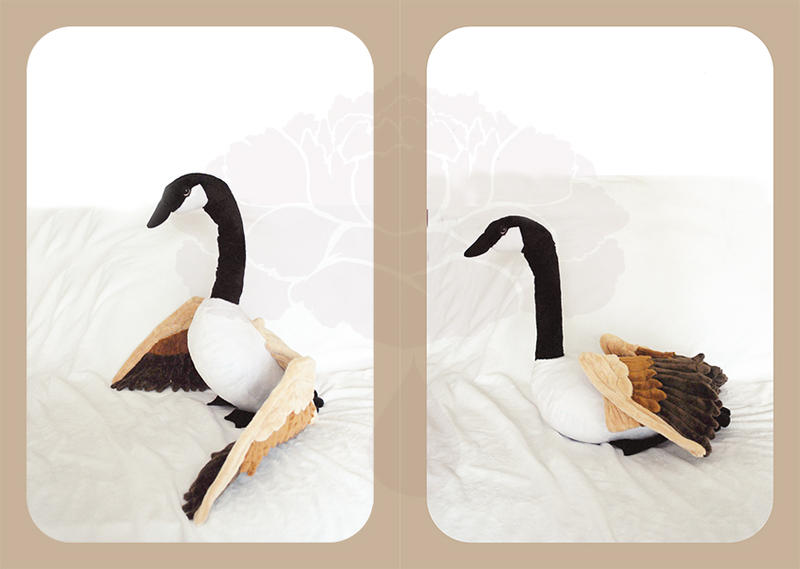
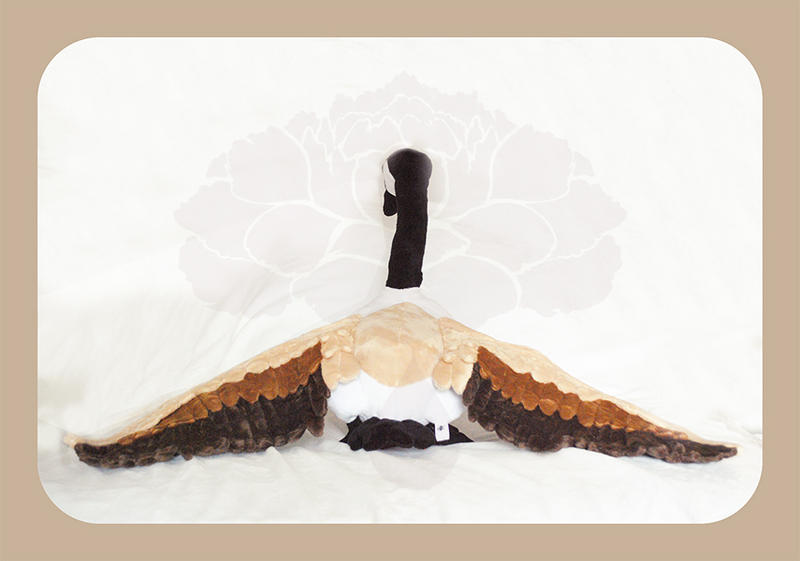
A Realistic Styled Canadian Goose: My Process


Oh I had to rest a day or two before I could even summon the strength to write this. I first started this project a month ago and came up with a plan:

  • ultrasuede beak & feet
  • pose-able anatomically correct folding wings
  • armatured neck and wired feet
I gathered a variety of photos of Canadian geese in different poses, looked at plush birds, and finally looked up wing anatomy. 

Goose body with one wing structure
I started with the head first before making the  body and estimating the distance needed for the neck. I had sewed the minky part of the head together with the intention of being able to machine sew on the finished beak. Alas that wasn't possible given the tough to pin nature of the ultrasuede, so I had to settle for hand sewing it. I bent 2 straight needles and just had to give both my hands a rest from the stress of sewing through layers of ultrasuede. 

Upon finishing the head, I noticed that a goose's body has a gradation of colors, so I chose three tans/browns to use for the wings. The commissioner had requested for something more huggable than a doll for display so I decided to do the main structure of the wings with wire. I had played with ideas of steel spokes already made to bend, plexiglass, and foam core, but none of these suited my use. 

To make the wing structure, I bought 12 gauge aluminum wire and with a sketch I drew of the bone structure, I wrapped one wire around the other to form a stronger wire that will stand up to much posing. The downside to that is when I went to sew the wire into the plush lining, every time I hit a wire, I broke a sewing machine needle. It ended up being the limit to my machine's foot with two pieces of minky, quilt batting, and a thick wrapped wire, but using a total of four pieces (two for the outer most structure and one more for the inner bottom) and several hours later, I had two complete wing structures. 
Start of feathering with two of the colors
Now time for the feathers: It was my first time attempting this sort of wing, so I did not really have a plan for where to start feathering. I decided to do it in four sections according to where the wing would need to bend when the wing would close. I used the middle to provide a sense of scale and also because the wing centered around everything else folding over the middle. 

Next up: outer section

Finishing up with the inner section & another bent needle
It is important to note that I drew feathers of varying shapes depending on where in the wings they were. I had looked at drawings of feathers and was warned by anatomy books against using just one single pointed shape. The shapes of the feathers ultimately helped shaped the overall structure of the wings for a finale that I'm quite pleased with. The inner most part blended perfectly with the tan back I had originally incorporated in the design


Finally the last part was to do the "drumsticks" and legs.
Attacking the legs
This was fairly simple: using the same 12 gauge wire, I wired the legs and stitched the wire into place using my machine, then had the lovely task of hand sewing the wired legs to the body. First I attached one side to the body, following that with the unstuffed drumstick. By sewing the drumstick over the legs, I had the legs attached to the body on one side and the drumstick on the other and once stuffed, the drumstick provided structural support for the legs. 

The finish project measured 20 inches from beak to tail and 1 yard/meter in wing span. I had crammed the remainder of the project right in after I got the boxes from my old apartment into my new and sewed for a minimum of 10 hours for 5 days straight in my desire to finish this (I actually would forgo eating just due to concentration) I learned a lot about wire, quilting, and ultrasuede in this project. I'd have to say I am well exhausted and have no desire to attempt such a project until I recover, but it was definitely an experience. 

I'd like to thank the person who commissioned this! Each piece is always to learn more.

Now for some brunch and possibly some livestreaming later.
Have a wonderful day and thanks for reading,
Laine

Thursday, July 17, 2014

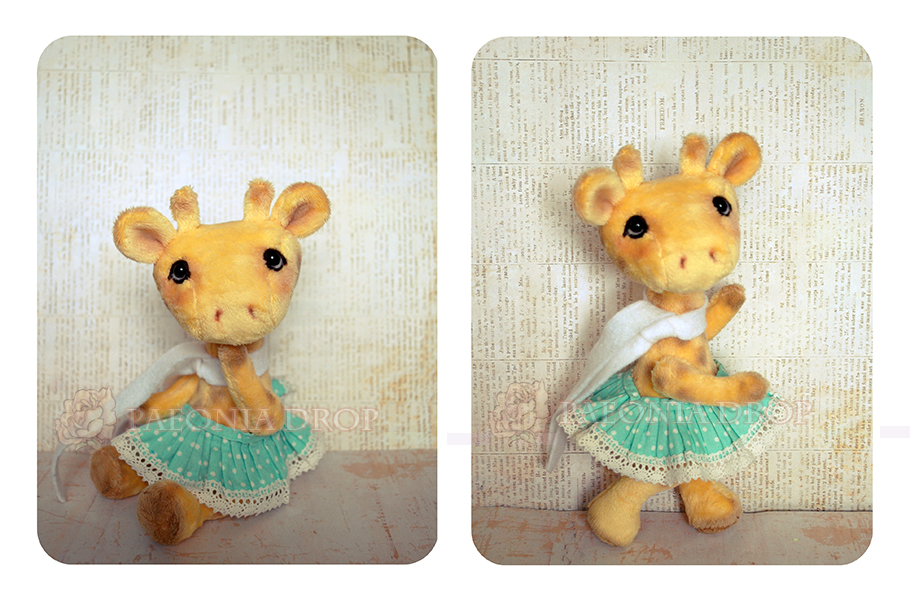
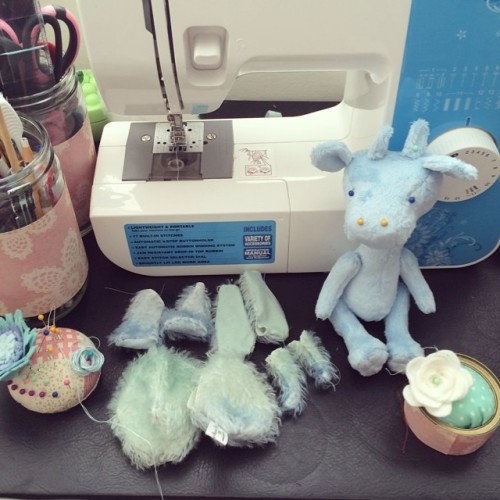
The Story of A Blue Giraffe Named Clover

Clover's story probably best begins with Christmas last year when my friend Kimmymanga sent me the most adorable pens.

I never really thought about it extensively, but this blue giraffe definitely provided me with enough gumption to make another giraffe. It was also because I had heard from my talented friend Nyssa that she'd be giving the idea a go. 
Blue Giraffe Commission by Nyssa
It just sounded too adorable to pass up, so I set out to have the pieces cut and the majority of the machine sewing done before I left to visit fiance and family in California. Sadly, in my scramble to pack and clean, that did not happen, and in the time I spent there, I only managed to get the head hand sewn. It was a first for me not to be sewing my way through the long layovers, but spending time with friends and family sometimes needs to come first. 

Something I realized was that our time with the special people in our life is really what means the most. Often I keep myself isolated from those offline. I have just retreated to being a person behind a screen, and it was a wonderful change to take the time to have conversations with family, go jogging, and just be beside them to talk, play, or just enjoy their company. 

When I was finally ready to finish it, I had run out of eyes, so for a while, he was sitting looking quite sad with me, but I was already starting to love him. I took the time to needle sculpt his feet to give him hooves, and it was just the right touch. 


Today I finally had it in me to just finish him. As I was working on his eyes, I realized he had the kindest eyes I have ever felted. Something about them just spoke to me. Originally, I had intended to make a gentleman character to match the last giraffe I created, but he was just so guileless, like a child.
My last giraffe: Georgina
 I still had every intention to dress him while I was shading him, but by the time I finished, I set him down and he just looked at me, and told me he didn't need to be dressed.
The back of Clover as I added his markings
And so here he is now.

 For added warmth to compliment his cool tones, I added a warm golden brown to his ears and cheeks instead of my usual pink blush. He really made me feel at peace when I finished him. I hope you'll enjoy him as much as I have. He is looking for a home, so please feel free to click here if you are interested in adopting him. (All materials are also listed)

Thank you for reading,
<3 Laine

Wednesday, July 16, 2014

4 Projects at Once

In the past, I've never had more than one project open at a time. Sometime over July 4th weekend, I ended up running out of eyes and needing a couple other things to complete commissions, so naturally I put my current project (blue giraffe) on hold and my goose commission on hold to start more con prep and when I wanted a break from that, I started doing some sewing for my second commission.

 LO AND BEHOLD, the package with all the things I ordered came that day, so I was more than torn in a few directions. I didn't like having multiple unfinished things at once so I settled in and spent the good remaining of the day finishing what was closest to completion: 5 shoot star plushies to go with the original

Then I wet to approach my largest priority: the Canadian Goose

After working two full days of 10+ work hours, I had the head done right, ultrasuede beak on (nearly killed my wrists), neck made with skeleton, body sewn and stuffed, and the beginnings of a wing in progress. I'd have to recommend to those who use wire not to twist two pieces of 12 gauge wire together and then try to get your machine to hem it in. I broke 2 machine needles because the wire wasn't twisted 100% uniformly (and you can't see it under the minky). There were times when I was chugging along, that I would just hit that twisted wire and BAM off it snaps and usually I have to go in with tweezers to remove the broken portion out of sewing. This task actually can prove to be quite tough given the thickness of the minky+batting+wire. I thought about sewing it, but the wings themselves are quite large to begin with. If I were to annotate through my process,this post would get too long.

In the end I compiled a mental pros and cons list in cause I ever decide to have so many things going on at once:

Pros:

  • There is variety, so you can keep your interest from waning by working on a few things at once
  • Can increase efficiency (do all your cutting at once, sewing, assembling)
Cons
  • Can feel overwhelming esp to people who require certain amount of control in their life to function
  • Can lead to being distracted because you DO have the option to work on multiple things
All in all, I'm trying for less structure when it comes to myself and doing things more with my energy levels. Once I finish these I will probably go back to my original arrangement, but it was definitely interesting (and stressful).

Question for you: Do you typically work on one thing at a time or multiple projects? I'd love to hear your pros and cons list.

Until next time,
<3 Laine

Thursday, May 1, 2014

Moving one step at a time: Commission WIP

Good morning everyone,

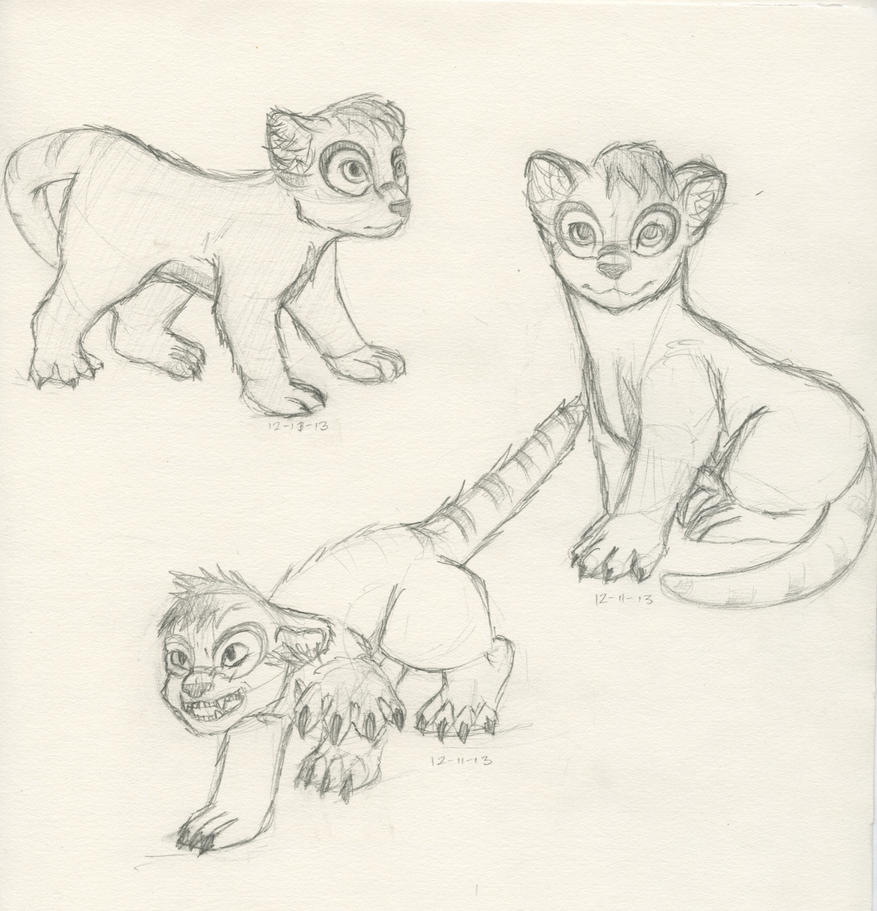
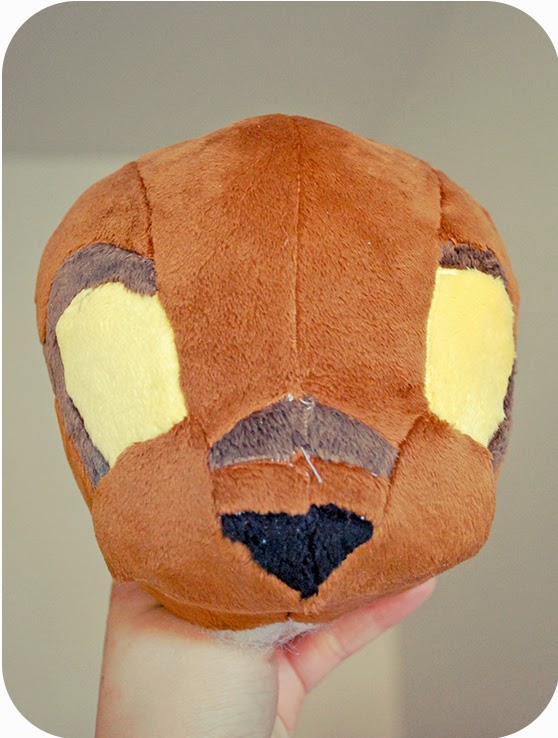
I wanted to share with you a commission that I've been working on: a fossa. The commissioner wanted to get a special gift for someone and I was challenged with creating that someone's fursona. I've never done anything like this before, and as I'm working on it, I remember why markings make sewing much more involved.


I started about a month ago with two prototypes for the head. This was the first time I was trying for cheeks without an needle felting involved. After a little frustration (ok quite a bit) I ended up with something that has face markings. Overall the head consists of 31 pieces of fabric and amber glass eyes. A quick note: face markings tend to make things difficult to sew if they are not embroidered.  
 After assembling the base for the head, I needed to do some needle sculpting and cleaning up to define the shape of the face and also put the head joint in.
Needle sculpted and with eyes in

Hair, ears, and ear fluffs added

I don't think these photos do the head justice. The shape and eyes have so much more depth in person.  The next step I'll be taking is to make the pattern for the limbs and adjust the body pattern a little before cutting it out and assembling it. It's definitely one of my more ambitious projects and I hope to be done by the end of May.

Sunday, March 16, 2014

The Making of "Summer"

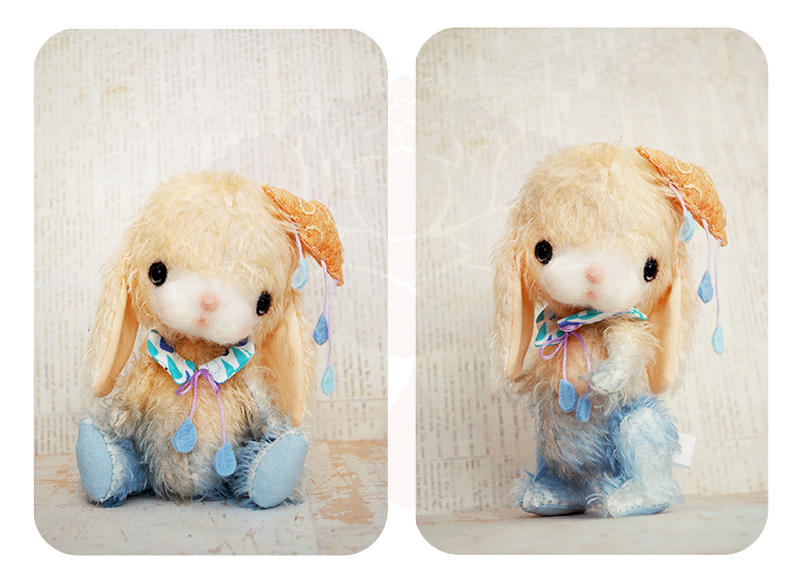
I had the thought for Summer a two weeks ago walking home from the doctor. My appointments usually finish around 4.30 pm, and the sun was just starting to go from blue to orange. I had just finished Chester, so I didn't have the intention of making another piece before finishing my commissions. I was still feeling very lost and frustrated with my life and the lack of progress I was making in discovering myself.

When I finally worked for a good day, I started working on her. I hadn't realized it's been 9 months since I last made a rabbit, so I felt it was due time.

I actually want to be able to share Summer herself with you this weekend, I had a bout of ill health that set me back an entire day. It was the kind of bad day where you couldn't even watch tv in bed. I literally had to sleep or at least attempt to, and my head felt like bruised fruit, and my eyes hurt and it was all miserable.

I wanted to share with you all I have done so far and in a more comprehensive manner than when I did Chester's WIPs. She's almost complete, I just need to needle felt her face and tail and finish off her accessories.

Color Palette For Summer
Inspired by the setting sun, I loved the orange and blues, so I wanted something that reminded me of the summer showers that happen so often where I live, where it's warm one moment and stormy the next. Flashes of rain and warmth inspired this piece.

Summer's Dye Job
Summer's mohair was dyed in an array of gradients. It was not done in a very exact manner and was meant to have a more natural and gradual transition from the daytime to night sky.

All pieces sewn together
In her head, I've added a small magnet to hold up her little cloud hair piece.

Stuffed but not yet assembled
Assembled with variable gradients visible
Face prepped for needle felting & with glass eyes


Now for some Spring cleaning and school work before I find some time to finish her up.

Edit: She's complete
Face felted, ears pinned
Finished little lady


Tuesday, March 4, 2014

New Little Fox: Chester Plus Instructions & WIPs

Hi everyone, I wanted to introduce you to Chester. 

I made him when I was feeling frustrated and lost with my craft. I just had to create something for the sake of creating, so I made this little boy. I've been meaning to make a fox for over a year but just never got around to getting orange dye, so I just never made one. When I make a doll, I always keep a story in my mind because it helps me flesh out the character as I put him together. For him, I envisioned the story of the runt of the litter who was born with patches of him that were not an even color (his outer right leg & inner left leg and arm).  He's  the little fox that's doesn't play with the others but is still wanting to fit in. Perhaps someone to use the key around his neck to give him a forever home.
______________________________________
I really wanted to do a progress post, but I had gotten a little carried away in the middle so I actually do not have any photos during that time.

Step 1 (Brainstorm): For me, this is always to brainstorm and gather inspiration. I look at pictures of fox kits, other commercial fox plushes, fox dolls, and art. I then draft a pattern inspired these pieces. 

Step 2 (Gather materials):  I like to gather his materials for and determine a color palette if I'm making accessories. I had picked seafoam green and a soft blue violet for his palette, but decided that his character did not need those accessories so in the end I did not make them. For him I needed ecru mohair, orange dye, white & black minky.

Step 3 (Draft pattern & prototype): For him, I made a 3 piece head (two for the face, one for the back). I used two darts on his head to give it more of a 3 dimensional feel. From the face pieces, I cut out the sections I wanted white and the sections I wanted orange. I ended up with a 5 piece head. I drew his ears as inspired by the photos I looked at earlier. For his body, I make a 2 piece body and use darts to give it more dimension. As with the face, I cut out the parts of the chest I want white and the parts I want orange. I end up with 4 pieces. I then draw arms, legs, and tail and cut out the black and white pieces from the orange. Now I have a total of 37 pieces. 

If you are not sure about your pattern, you should prototype it first before using more expensive fabric. I prototype on muslin because it does not stretch. Choose your fabric according to the stretch of the fabric you are using.

Step 4 (Dyeing): I trace the pattern onto the mohair to determine how much mohair I need to dye. I usually use a very small seam allowance but because I know dyeing mohair will shrink the backing, I add extra to the seam allowance to accommodate shrinkage. Afterwards I let my mohair dry overnight. 
Step 5: All of Chester's pieces cut out. There are five piles: light orange, dark orange, ecru, white, and black
 Step 5 (Cut & Sew): Here is where I got a little swept away and forgot to take photos. After you cut your pieces, you sew them and turn them. Since I am jointing my doll, I mark on my doll where I am putting the joints, so when it comes time to joint, it will all be symmetrical. The tail and tag are placed in the seam of the body before the body is sewn. All pieces are then flipped.

Step 6 (Stuff & Joint): I start by stuffing the head and limbs and not closing them off. Then I insert the joints and sew it closed before attaching the head and limbs to the body. I then add weight to the tummy, stuff the neck firmly, and sew it closed with.
Step 6: Pins to mark eyes and nose. Body isn't stuff yet, but the ears are pinned to the head
Back of doll with tag, tail, and crumpled ribbon.


Step 7 (Felt face): Prep the face by plucking out the mohair. Glass eyes are put in, secured with both thread and E6000 glue . Eyelids, waterlines, and the base of the face are felted on. Tear drop shaped pieces of felted wool were added, then blending into the base. A nose was then added.

Step 8 (Finishing Touches): Doll was blushed with pastels.  Inner ears were shaded with a taupe blend. 
For the ribbon around the neck, I took two pieces of seam binding ribbon, sprayed with water, crumpled, and left to dry overnight. I added a key and made a 6 loop bow.

Thursday, November 7, 2013

My First Large Doll: The Story of a White Unicorn

Edit: Now with references since the commissionw as delivered.

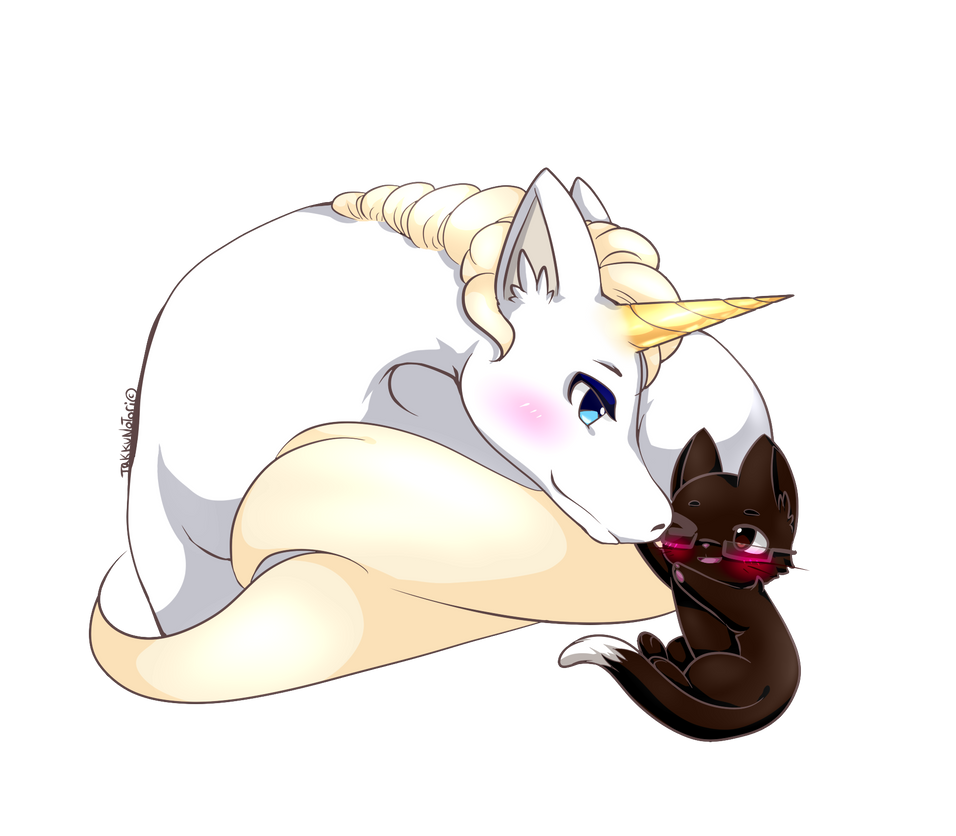
For the past 2 1/2 years that I've been plushing, I have never made anything over 6.5 inches. I received a challenge this year from a commissioner to make something relatively to scale based on an image they gave me. I made two dolls and had wanted one to be 3x bigger than the other.

(I apologize for the poor background. This plush is larger than any setup I have for photographing it.)

For me, there are 3 main differences I faced when scaling up. They came up in :

  • jointing
  • eyes
  • construction of the mane. 

Jointing:
One of the things I definitely struggled with was figuring out how to joint the doll. I worked with bolt joints for the first time and having never even used a wrench before it took some figure out. I picked a tapbolt with a nyloc nut, and I was frustrated for a couple of days trying to figure out why the limbs kept falling off, only to realize I have to break the nylon on the nut.

Eyes:
It was also the second time I worked with colored eyes, which always throws me off when looking at the face. Constructing the eyelid and white of the eye out of wool at such a size also threw me off.

Construction of the Mane:

The mane itself was an even bigger job than the ones on my small ponies (even though the small manes are all sewn by hand). For the mane, I machine sewed each strand, stuffed it, then hand sewed them onto the head as well as sewing the strands together for one continuous piece. I am very pleased to get results that match the reference I was given

To sew the strands together and attach them to the head took 7+ hours of hand sewing alone, not to mention the time it took to construct the strands.

Last but not least, I have attempted satin stitching on my machine to put together a tail, but I have yet to get the result I like despite using heavyweight interfacing. I know the results can be achieved without a walking foot, but I have yet to figure out how to get smooth stitches.

Overall, I am happy with my first attempt at a large doll and his mane sorta makes him look like a princely character to me. (I've been watching too much MLP) He'll look more complete with a tail and all the proportions will make sense then. Hopefully I will figure out a way to photograph him so that the photos will do him justice.

Until then,
Laine

Saturday, September 28, 2013

Adventures with a Sewing Machine


Another cloudy weekend morning where I have to go into work. I have actually been more interested in working on this commission than crunching some data and struggling with the new assay we are using in our lab. My boyfriend got me this little machine. Having never machine sewed, I did things via trial and error. After 1/2 a spool of hand sewing thread, I figured out a couple things:
-I can't use hand sewing thread on a machine
-When bringing up the thread from the lower bobbin, I need to actually pull out the loop, not maintain it
-I can't get good tension with super thin fabric
-Although there are techniques for sewing round pieces without pinning, for a first time user, it's better to use pins

After a couple of hours figuring it out and finally getting the tension right, I started working on this unicorn. I have the head, legs, and body sewn. Now it's just waiting for ears, mane, horn, and eyes. I put my finished kitten next to it to show the scale. Both are private commissions.

Hopefully after my project due on the 6th, I'll have more time to work on dolls.

Monday, September 9, 2013

Starting a New Kitten

(Yes this is my small and slightly messy workspace for my soft sculptures. I have a laptop for entertainment, beading wire & duct tape of some sort for armature, jewelry plyers, darning needles, embroidery & fabric scissors, hemostat, tweezers, isopropyl alcohol for clay work, tea and magnesium for headaches)

It's cloudy outside this morning which makes it a perfect time to blog. I actually meant to write this yesterday, but didn't get around to it. The commissioner requested that this kitten be able to reach up for something, so I put my hand to understanding and working armature. This is my first time trying to wiring the limbs and tail, and while I had a general idea of how it was done I could not figure out the specifics on how to get the wiring to stay in one place while stuffing. I went searching in other places and became especially curious on how artist dolls (dolls with resin heads and limbs, but soft pose-able bodies) were assembled. Luckily, Magweno (magweno.com) had an old tutorial that provided some insight. The solution to my problem was to wrap the armature in quilt batting so that I would not have to stuff it afterwards. I would sew one side of the arm, flip it, put the batting wrapped armature in it, and ladder stitch it closed. I am not sure yet if this is more time consuming than how I usually work, but it works very well. The armature doesn't shift and I'm able to pose the arm as I like.

Since then, I have started prepping the face for needle felting, and will work on the later in the week when I have more time. Mondays and Tuesdays are always the busiest days for me.