Showing posts with label artisan doll. Show all posts

Friday, March 13, 2015

Inside the Studio: Creating a Sheep

Hi everyone,
Hope you are all doing well. I wanted to create a series of posts where I will talk about the thought and approach I take whenever tackling a new project. And a lovely little tag now helps you search for similar posts!

Gathering Inspiration

I knew ahead of time, that the next time I were to attempt a sheep, ram, or goat, I would make an art doll rather than a soft sculpture. I am just so inspired by people who sculpt the faces and feet of their animals. My favorite art dolls definitely come from Magweno.

Rather than sketching out a draft of what I want the finished piece to look like. I first decide on a color palette and then decide on the theme for the accessory. After playing with a variety of colors and themes, I decided to draw inspiration from the past and redo my first lamb.
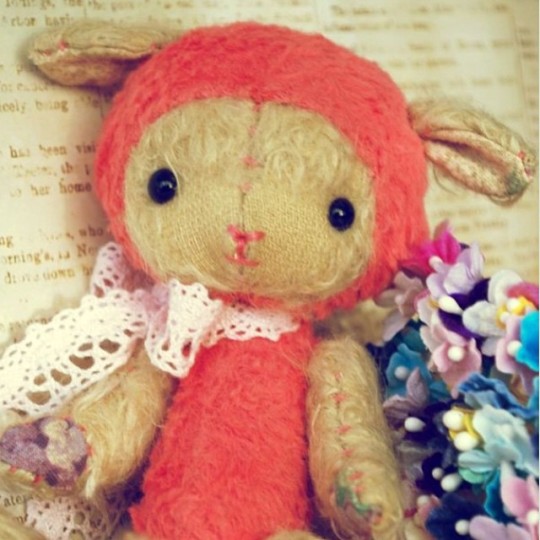

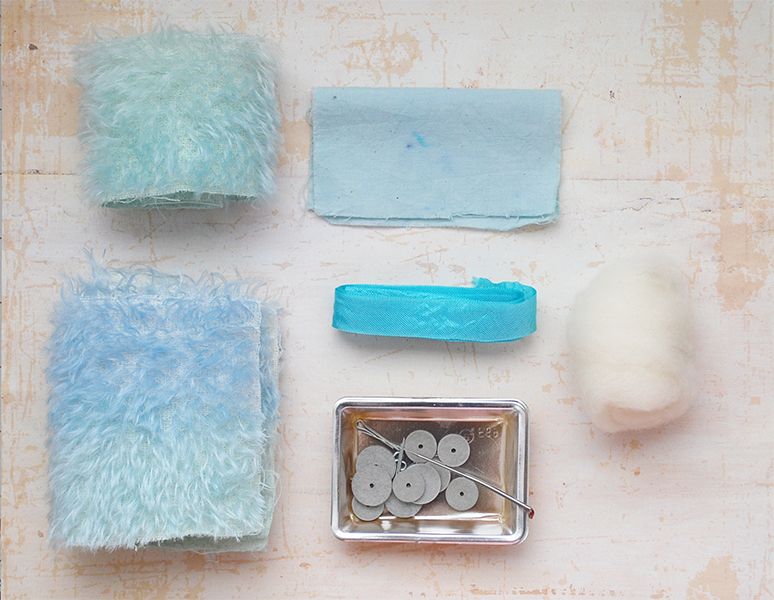
Back then, I bought my mohair and viscose dyed, but now that I have my own dye pots and dyes, I went for a softer cream and pink and then wanted to incorporate the flowers in by making a flower crown. I went with Forget-me-nots, and I love the colors of the batch in the first photo. I gathered some photos of flower crowns on Pinterest for an idea of how I would like to approach it in doll size. I like to collect doll photos and other crafting inspiration. If you need some images to get your started, you can find my boards here.


From the dye pot, I go straight into the doll. I know some artists like to sketch out a basic draft, but I am more of a kinesthetic person than a 2D visual person, so I like to be more fluid and play with the ideas before fixating on anything in particular.

Sculpting


Next up I had to tackle on how I would like to create the face. I used a shorter pile for the face to distinguish from the longer pile in the body. I created a heart shaped face just as a preference. The blue pin marks where I intend to attach horns. 
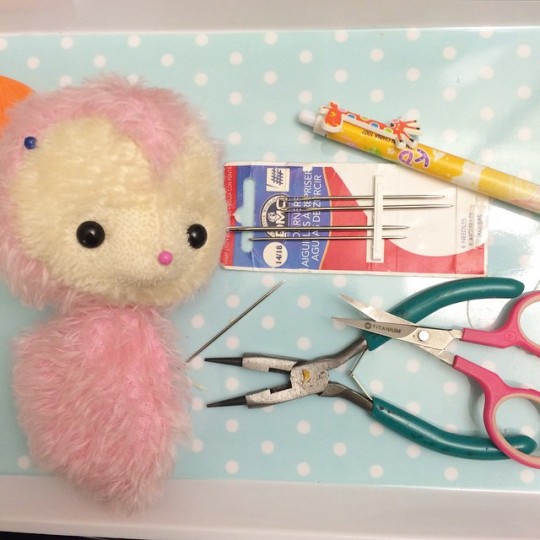

I chose slightly larger eyes and a smaller, longer face after staring at some sheep photos. They also have that lovely nose that's very pronounced, so I tried to translate it into my doll. 


I went for a more distinct inverted "v" nose with a small face. Sculpting the eyelids downwards do give a more full sweet expression. Tip: The larger the eyes, the closer you might have to set them so that ends do not hang off the face. It still gives you enough space to add eyelids and a waterline. Nothing like a waterline for a more "dolly" effect.
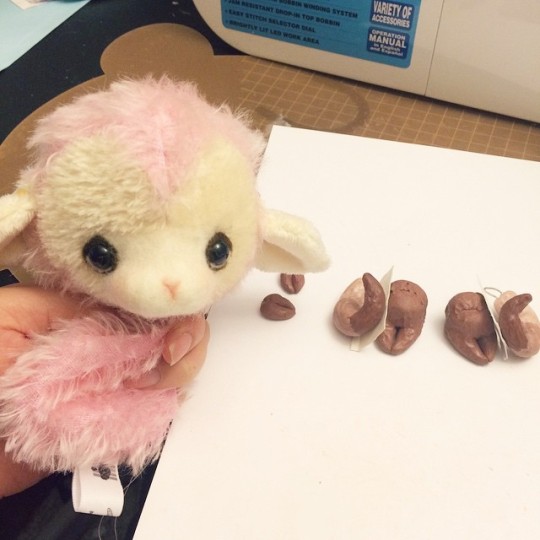

Continuing the Blooming Spring I went with a warm cocoa brown, I sculpted little hooves for the arms and then decided I wanted her to stand. Choose a larger flat design to help balance her head out. Using a ball tool, I textured her hooves and horns, drawing on anthro BJDs for inspiration. 

Choosing how to curl her horns was probably the most time consuming part. Lots of google searchs of sheep and sheep dolls and sheep sculptures were involved, and I played around with it and her ears to decide how they would best fit in her head. 

After all the pieces were baked, I made new limb patterns to fit the clay parts.  Tip: Don't use hot glue, it will not hold to either the clay or the fabric. Your clay will pull right off. I like using a cyanoacrylate of some sort (Super/Crazy Glue)


Once the limbs are made, all that's left is some assembling and the sheep is done.

Accessories

Last but not least are the accessories. For me, the little details really make the doll. I wanted to bring back some of the pinks, purples, and blues from the first photo, I braided a headband in my favorite shade of green and made some lovely flowers and buds. Then a little gloss and ribbon to finish it all off.


Well there you have it! One little sheep done!
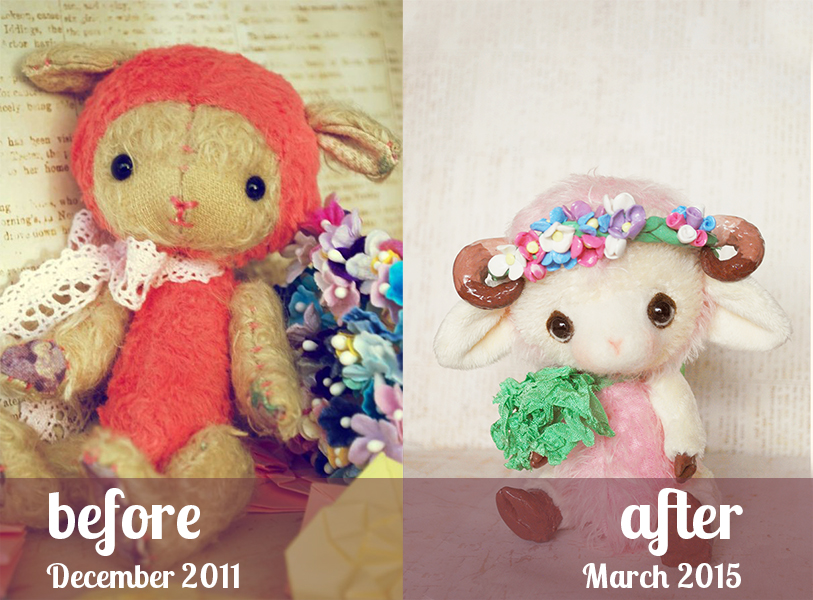

It's an updated spin on a past idea! I hope you enjoy Divina as much as I did.

Stay tuned for more experimental adventures this year by subscribing via email or Google. Widget is in the side bar.

Until next time!
I'd love to hear from you, so keep in touch!
Laine

Sunday, November 2, 2014

The past three months

For all those new to my blog or just new to me in general, I'd like to just do a quick recap of the past three months or so, so we can catch up and get to know each other. It's the lightning rounds!

Commission Roundup!

AWA 2014 Roundup!

Chromatic Garden Roundup!


To see which dolls are still looking for a home click here!

Now hit reply and let me know what you've been up to!

Friday, August 8, 2014

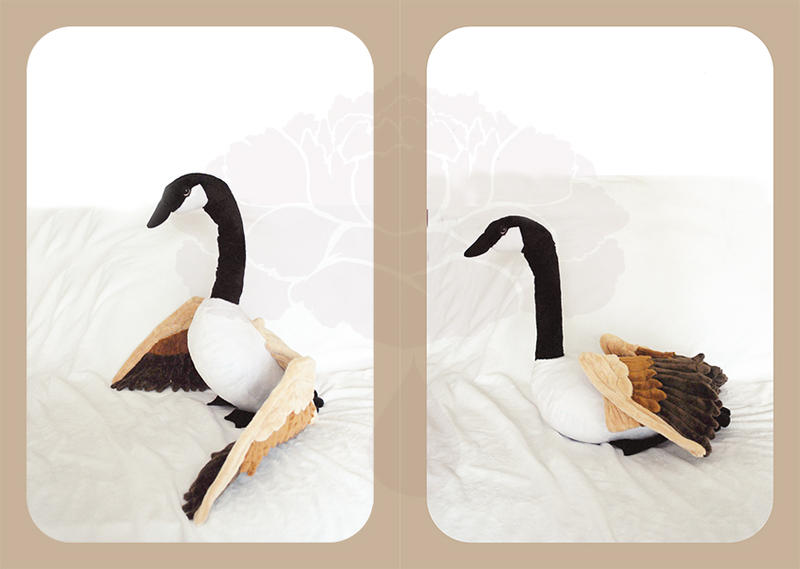
A Realistic Styled Canadian Goose: My Process


Oh I had to rest a day or two before I could even summon the strength to write this. I first started this project a month ago and came up with a plan:

  • ultrasuede beak & feet
  • pose-able anatomically correct folding wings
  • armatured neck and wired feet
I gathered a variety of photos of Canadian geese in different poses, looked at plush birds, and finally looked up wing anatomy. 

Goose body with one wing structure
I started with the head first before making the  body and estimating the distance needed for the neck. I had sewed the minky part of the head together with the intention of being able to machine sew on the finished beak. Alas that wasn't possible given the tough to pin nature of the ultrasuede, so I had to settle for hand sewing it. I bent 2 straight needles and just had to give both my hands a rest from the stress of sewing through layers of ultrasuede. 

Upon finishing the head, I noticed that a goose's body has a gradation of colors, so I chose three tans/browns to use for the wings. The commissioner had requested for something more huggable than a doll for display so I decided to do the main structure of the wings with wire. I had played with ideas of steel spokes already made to bend, plexiglass, and foam core, but none of these suited my use. 

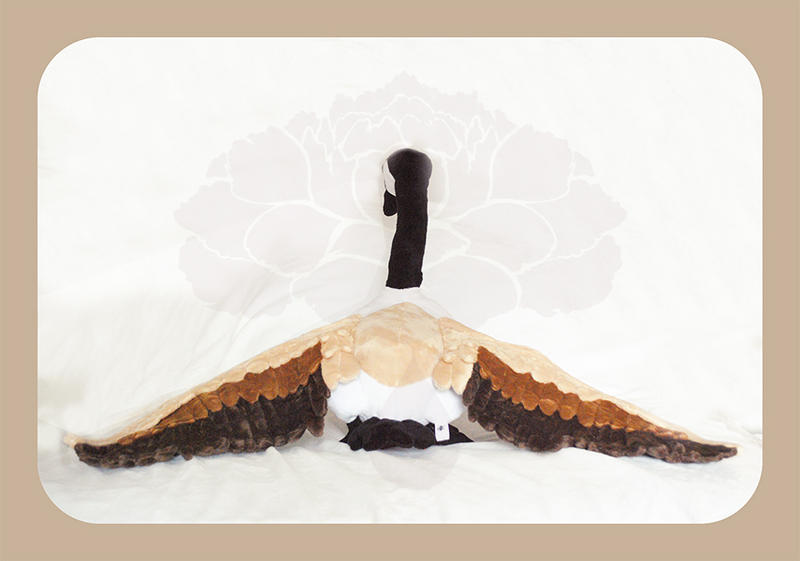
To make the wing structure, I bought 12 gauge aluminum wire and with a sketch I drew of the bone structure, I wrapped one wire around the other to form a stronger wire that will stand up to much posing. The downside to that is when I went to sew the wire into the plush lining, every time I hit a wire, I broke a sewing machine needle. It ended up being the limit to my machine's foot with two pieces of minky, quilt batting, and a thick wrapped wire, but using a total of four pieces (two for the outer most structure and one more for the inner bottom) and several hours later, I had two complete wing structures. 
Start of feathering with two of the colors
Now time for the feathers: It was my first time attempting this sort of wing, so I did not really have a plan for where to start feathering. I decided to do it in four sections according to where the wing would need to bend when the wing would close. I used the middle to provide a sense of scale and also because the wing centered around everything else folding over the middle. 

Next up: outer section

Finishing up with the inner section & another bent needle
It is important to note that I drew feathers of varying shapes depending on where in the wings they were. I had looked at drawings of feathers and was warned by anatomy books against using just one single pointed shape. The shapes of the feathers ultimately helped shaped the overall structure of the wings for a finale that I'm quite pleased with. The inner most part blended perfectly with the tan back I had originally incorporated in the design


Finally the last part was to do the "drumsticks" and legs.
Attacking the legs
This was fairly simple: using the same 12 gauge wire, I wired the legs and stitched the wire into place using my machine, then had the lovely task of hand sewing the wired legs to the body. First I attached one side to the body, following that with the unstuffed drumstick. By sewing the drumstick over the legs, I had the legs attached to the body on one side and the drumstick on the other and once stuffed, the drumstick provided structural support for the legs. 

The finish project measured 20 inches from beak to tail and 1 yard/meter in wing span. I had crammed the remainder of the project right in after I got the boxes from my old apartment into my new and sewed for a minimum of 10 hours for 5 days straight in my desire to finish this (I actually would forgo eating just due to concentration) I learned a lot about wire, quilting, and ultrasuede in this project. I'd have to say I am well exhausted and have no desire to attempt such a project until I recover, but it was definitely an experience. 

I'd like to thank the person who commissioned this! Each piece is always to learn more.

Now for some brunch and possibly some livestreaming later.
Have a wonderful day and thanks for reading,
Laine
Thursday, July 17, 2014

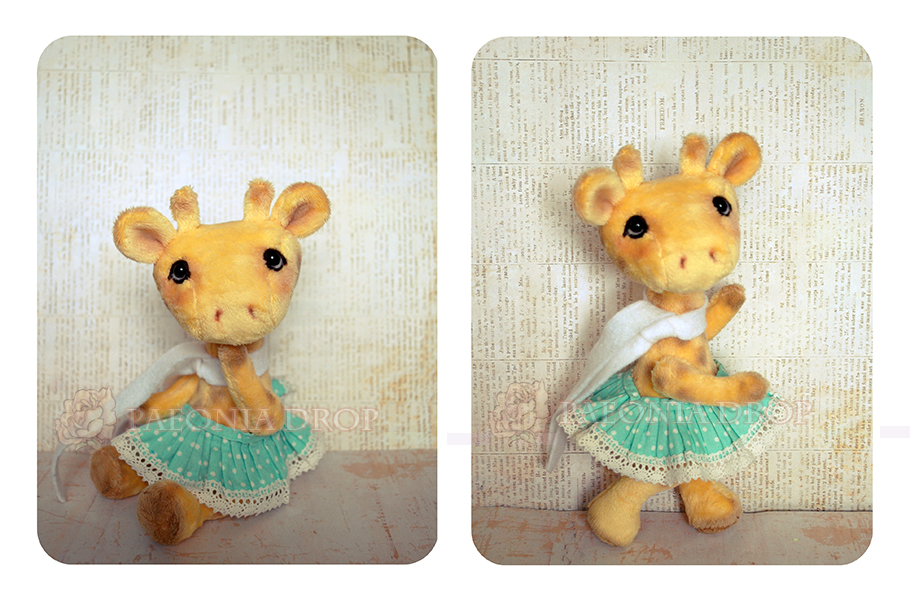
The Story of A Blue Giraffe Named Clover

Clover's story probably best begins with Christmas last year when my friend Kimmymanga sent me the most adorable pens.

I never really thought about it extensively, but this blue giraffe definitely provided me with enough gumption to make another giraffe. It was also because I had heard from my talented friend Nyssa that she'd be giving the idea a go. 
Blue Giraffe Commission by Nyssa
It just sounded too adorable to pass up, so I set out to have the pieces cut and the majority of the machine sewing done before I left to visit fiance and family in California. Sadly, in my scramble to pack and clean, that did not happen, and in the time I spent there, I only managed to get the head hand sewn. It was a first for me not to be sewing my way through the long layovers, but spending time with friends and family sometimes needs to come first. 

Something I realized was that our time with the special people in our life is really what means the most. Often I keep myself isolated from those offline. I have just retreated to being a person behind a screen, and it was a wonderful change to take the time to have conversations with family, go jogging, and just be beside them to talk, play, or just enjoy their company. 

When I was finally ready to finish it, I had run out of eyes, so for a while, he was sitting looking quite sad with me, but I was already starting to love him. I took the time to needle sculpt his feet to give him hooves, and it was just the right touch. 


Today I finally had it in me to just finish him. As I was working on his eyes, I realized he had the kindest eyes I have ever felted. Something about them just spoke to me. Originally, I had intended to make a gentleman character to match the last giraffe I created, but he was just so guileless, like a child.
My last giraffe: Georgina
 I still had every intention to dress him while I was shading him, but by the time I finished, I set him down and he just looked at me, and told me he didn't need to be dressed.
The back of Clover as I added his markings
And so here he is now.

 For added warmth to compliment his cool tones, I added a warm golden brown to his ears and cheeks instead of my usual pink blush. He really made me feel at peace when I finished him. I hope you'll enjoy him as much as I have. He is looking for a home, so please feel free to click here if you are interested in adopting him. (All materials are also listed)

Thank you for reading,
<3 Laine
Sunday, June 29, 2014

The Conclusion of "Four Seasons of Ombre": Autumn Aria & Winter Waltz


Hi everyone,

It has been a while since I wrote a post. Between finishing the Spring Semester and visiting family, I have been bouncing all over the country. During my actual travels, I did not get as much sewing done as usual because I chose to spend more time with people than dolls. It was actually a first for me. I usually get so much done on trains and planes. But without further ado, I'll introduce Autumn and Winter:

Autumn Aria:
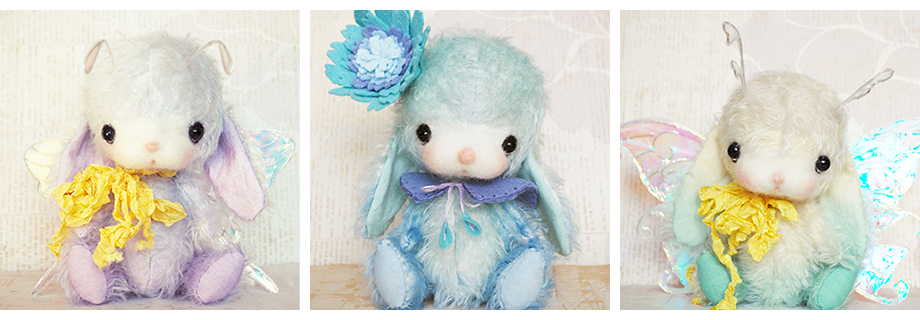
Autumn Aria is inspired by the forest and warmth of the changing of colors. Originally, I was very nervous to use vivid saturated colors, especially those in red. With the encouragement of Paula (from http://www.allbearbypaula.com/) who took the time to show me some of her vividly colored bears, I was able to take the plunge and dye the lower half of Autumn a cayenne red. Naturally being fall, I thought of school, so her sailor collar and headpiece reflect that of a school girl's.

Being a little heavier on the top, she was a little harder to photograph than Spring and Summer.
-------------------------------------------------------------
Winter Waltz

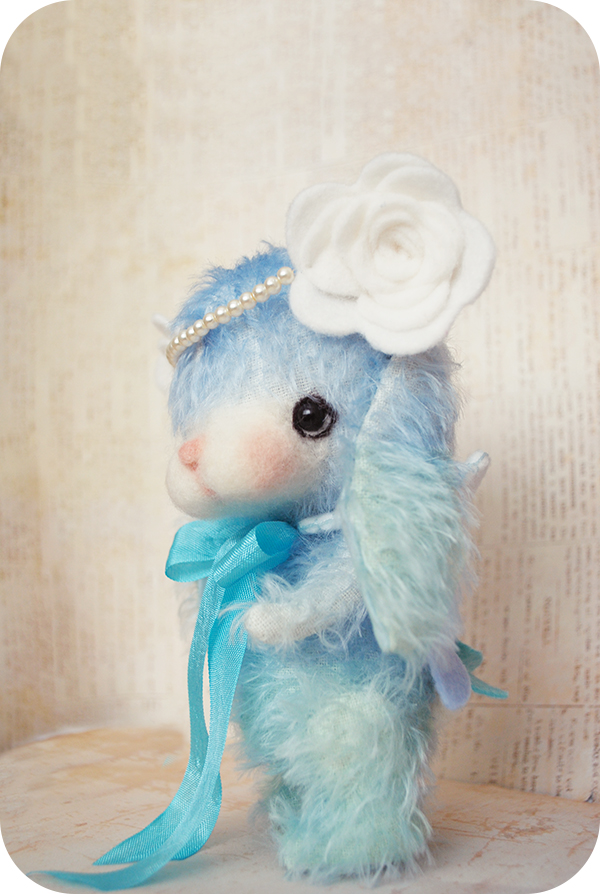
With this little fairy, she's full of longing to sprint and play. She is made of blue and a teal/kelly green ombre. For the longest time, I didn't know if I would make her a princess, ice queen, fairy, rpg inspired etc. Eventually I settled on something other than the conventional blues and whites of winter. I incorporated greens from the ice palace of Jessica Day George's Sun and Moon, Ice and Snow (a retelling of a Norwegian folk tale).

Armed with a new phone, it was much easier to take progress photos. As much as I love my DSLR, it can be quite heavy on the neck and hands during extended times. From sewing to felting, you can go step by step with me. I also had the pleasure of livestreaming the face felting for a few people. In the middle of the night, I had to remember how I made felt roses the last time and after 3 that were scrapped, I got the hang of it again.


Then the most important parts of her story: the wings and collar. Inspired by the high collars seen on queens in animate movies, I made a high back collar with a ribbon tie. I debated on how to add her wings and eventually settled for attaching them on the collar. They can be moved and pinned to show various stages of flight.


I can just see her reaching for the sky.

Now I have come full circle with Spring, Summer, Autumn, and Winter. With each piece I tried something that I've never done before, and I have to say, overall, I am pleased. I will have to take a break fro making bunnies for a while.

Until next time (a Canadian goose),
Laine

Monday, May 5, 2014

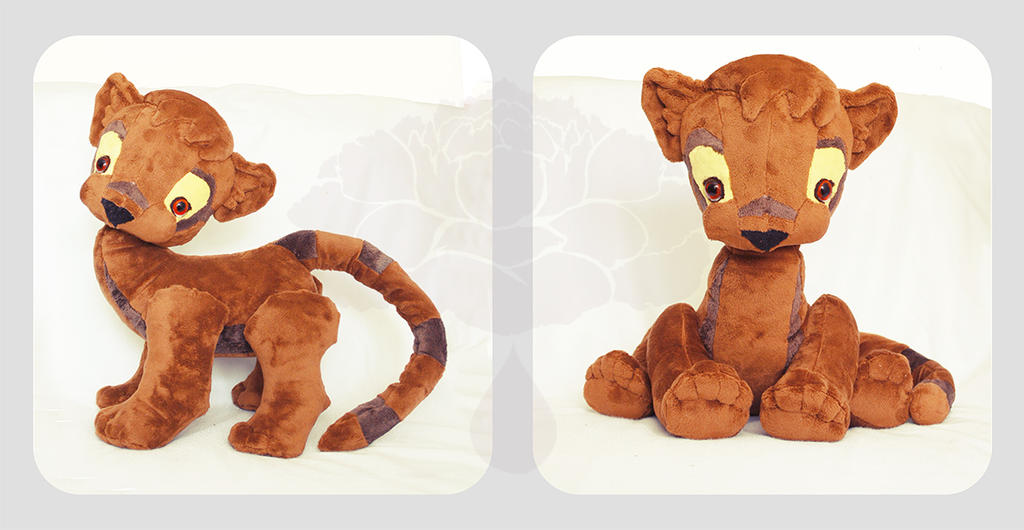
I AM FINISHED! Fossa Commission Reveal


I am so happy I finished this that I want to fist pump into the air and do a victory dance (which looks like I'm just having the fits). To see the process of the head please visit http://paeoniadrop.blogspot.com/2014/05/moving-one-step-at-time-commission-wip.html

Once the head was done, I tackled 32 more pieces to make the body. The body had markings down the chest that also had to be visible from the side. The legs needed hocks that were more curved on the hindlegs and not so much on the front. Before starting the project, I was a little daunted by the idea of having to needle sculpt toes, but I quite enjoyed it. I think it was especially helpful since I waited until after I finished shaping the feet to stuff the leg. Working with a partially stuffed leg gave me the flexibility to rework the stuffing into the toes as I was shifting it around to get the five digits.

Before and After Needle Sculpting
Something I do have to figure out is the neck. In order to have the head firmly stuffed so it won't deform, it ends up being quite heavy. I used a larger neck joint this time to give more support, but the head is still not as well supported as I would like. Because the commissioner did specify that she wanted it to be as huggable as possible, I really did not want to put in heavy weight interfacing to give it more structure. It would just feel stiff (like hugging cardboard.) I will one day have to figure out a solution to balance hug-ableness with structure. Until the next time I tackle a large quadruped plush.

(Next commission up is a Canadian Goose)

Thursday, May 1, 2014

Moving one step at a time: Commission WIP

Good morning everyone,

I wanted to share with you a commission that I've been working on: a fossa. The commissioner wanted to get a special gift for someone and I was challenged with creating that someone's fursona. I've never done anything like this before, and as I'm working on it, I remember why markings make sewing much more involved.


I started about a month ago with two prototypes for the head. This was the first time I was trying for cheeks without an needle felting involved. After a little frustration (ok quite a bit) I ended up with something that has face markings. Overall the head consists of 31 pieces of fabric and amber glass eyes. A quick note: face markings tend to make things difficult to sew if they are not embroidered.  
 After assembling the base for the head, I needed to do some needle sculpting and cleaning up to define the shape of the face and also put the head joint in.
Needle sculpted and with eyes in

Hair, ears, and ear fluffs added

I don't think these photos do the head justice. The shape and eyes have so much more depth in person.  The next step I'll be taking is to make the pattern for the limbs and adjust the body pattern a little before cutting it out and assembling it. It's definitely one of my more ambitious projects and I hope to be done by the end of May.
Saturday, April 12, 2014

Introducing Spring Serendipity


To adopt her: please contact me at paeoniadrop@hotmail.com

Spring is finally in the air. Where I live that means we went from snow to 80 F weather in the blink of a week, but that's nothing to deter me. She is the second piece in my "Four Seasons" line (name still pending some change).


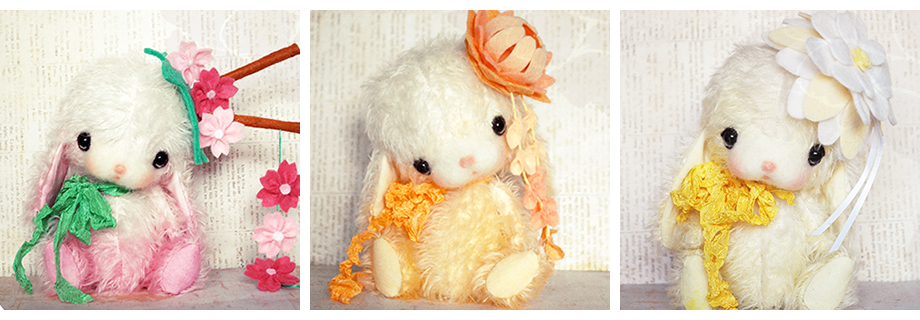
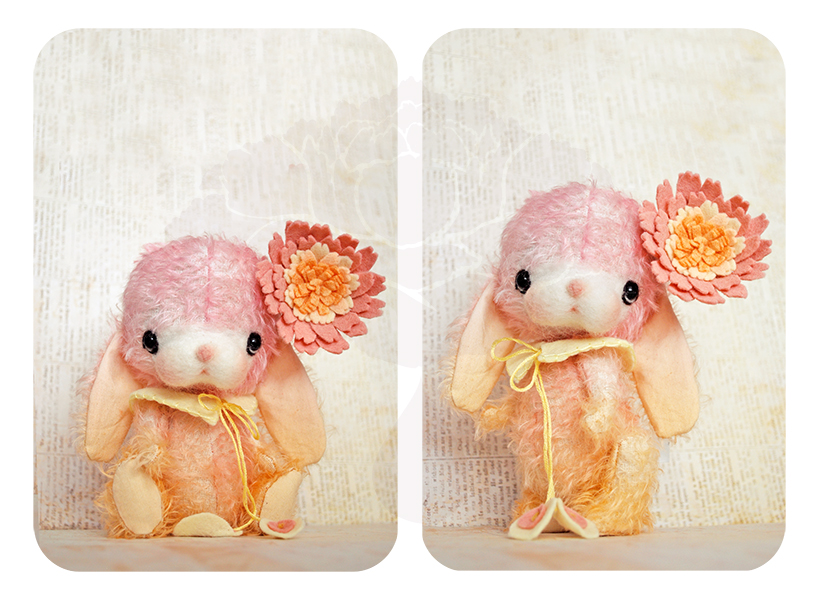
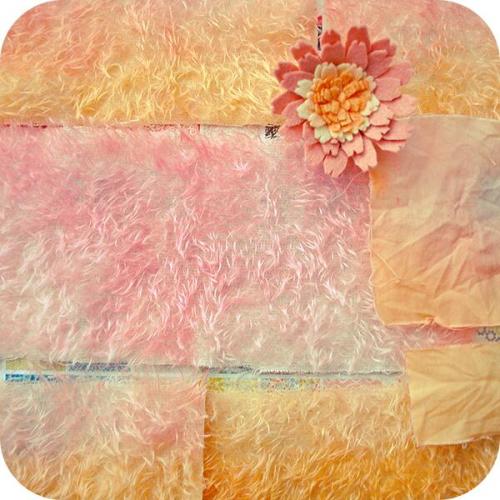
It actually took me a little playing around to decide on her final color palette. I knew I really wanted to do warm palette, but it took some deciding before I finally settled on pink and orange for her colorway. The ombre is much more gradual this time, with her ears fading into her body to gradient down to an orange just as her body is changing to orange. Even her little legs fade from a light to darker orange on their way down.

With the actual doll, I started with her multicolored hairpiece, and 3 hours and a good number of petals later, I had the base for her personality. I envisioned her as a blooming flower and a little bit of Venus in a half shell. (Which I tried to capture in her standing portrait)
Lily details on the ends of her collar ties


Hand sewing adds a sweet subtle pseudo scalloping on her collar

This was also the first time I documented the entire needle felting process (which I may add to my patterns later). I've never attempted it before because I need both hands to control the wool as I add it to her face, but hopefully they will provide those who want to create their own bunnies with more of a clearer picture of my process. I think this little add on will contain at least 10 images. (Pattern can be purchased here: http://paeoniadrop.storenvy.com/products/6064828-chubby-small-bunny-pdf-pattern)

Anyways, I hope you enjoy her and look forward to my Autumn and Winter inspired pieces

<3 Laine


Tuesday, March 18, 2014

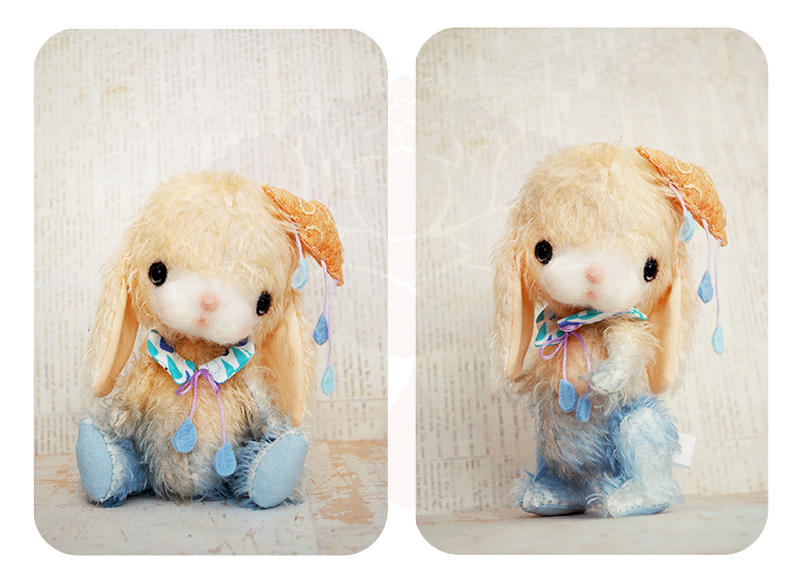
Summer Showers


I'm so excited to be able to introduce you all to Summer Showers. This was the first time I had a name in my head for the doll before it was even made. Usually I have to wait to see that face and get that feeling, but with her, I just knew.

I loved being able to share my process with everyone.(Her "Making Of" Post) I really liked being able to carry the motif of a fresh summer shower both in her accessories and in her colors. This was the second time I worked with gradients, and I really wanted to show many different gradients in her body (like an ever changing sky). You can especially see it on her back, where there are 3 areas where the color is allowed to fade as well as a surprise splash of blue on her head for a bit of whimsy.
Look at all those gradients!

Such a chubby little body & her magnetic little hair clip
I kept her face softer and rounder than all the other ones I have done before because I really wanted all of her to reflect that softness and warmth that I associate with summer. I instead of just rounding her eyes this time, I did pull down the top eyelid for a more feminine expression.
Close up side view of her face
Well that's it for mohair for now. I need to get my tuckus back on the commission track. Next up a Foosa. This should be quite an adventure for me. Can't wait to share it with all of you.

<3 Laine